MAT238 FINAL PROJECT
SPECTRAL SHELLS


MATERIALS / TOOLS / SOFTWARE
+ Artec Space Spider 3D Scanner
+ Blender 2.82a
+ MeshLab
+ Cura 4.13.1
+ Ender 3
+ Ultimaker S5
+ PLA (Marble, Flourescent Yellow, White)
+ Resin
+ Plaster
CONCEPT + MOTIVATIONS
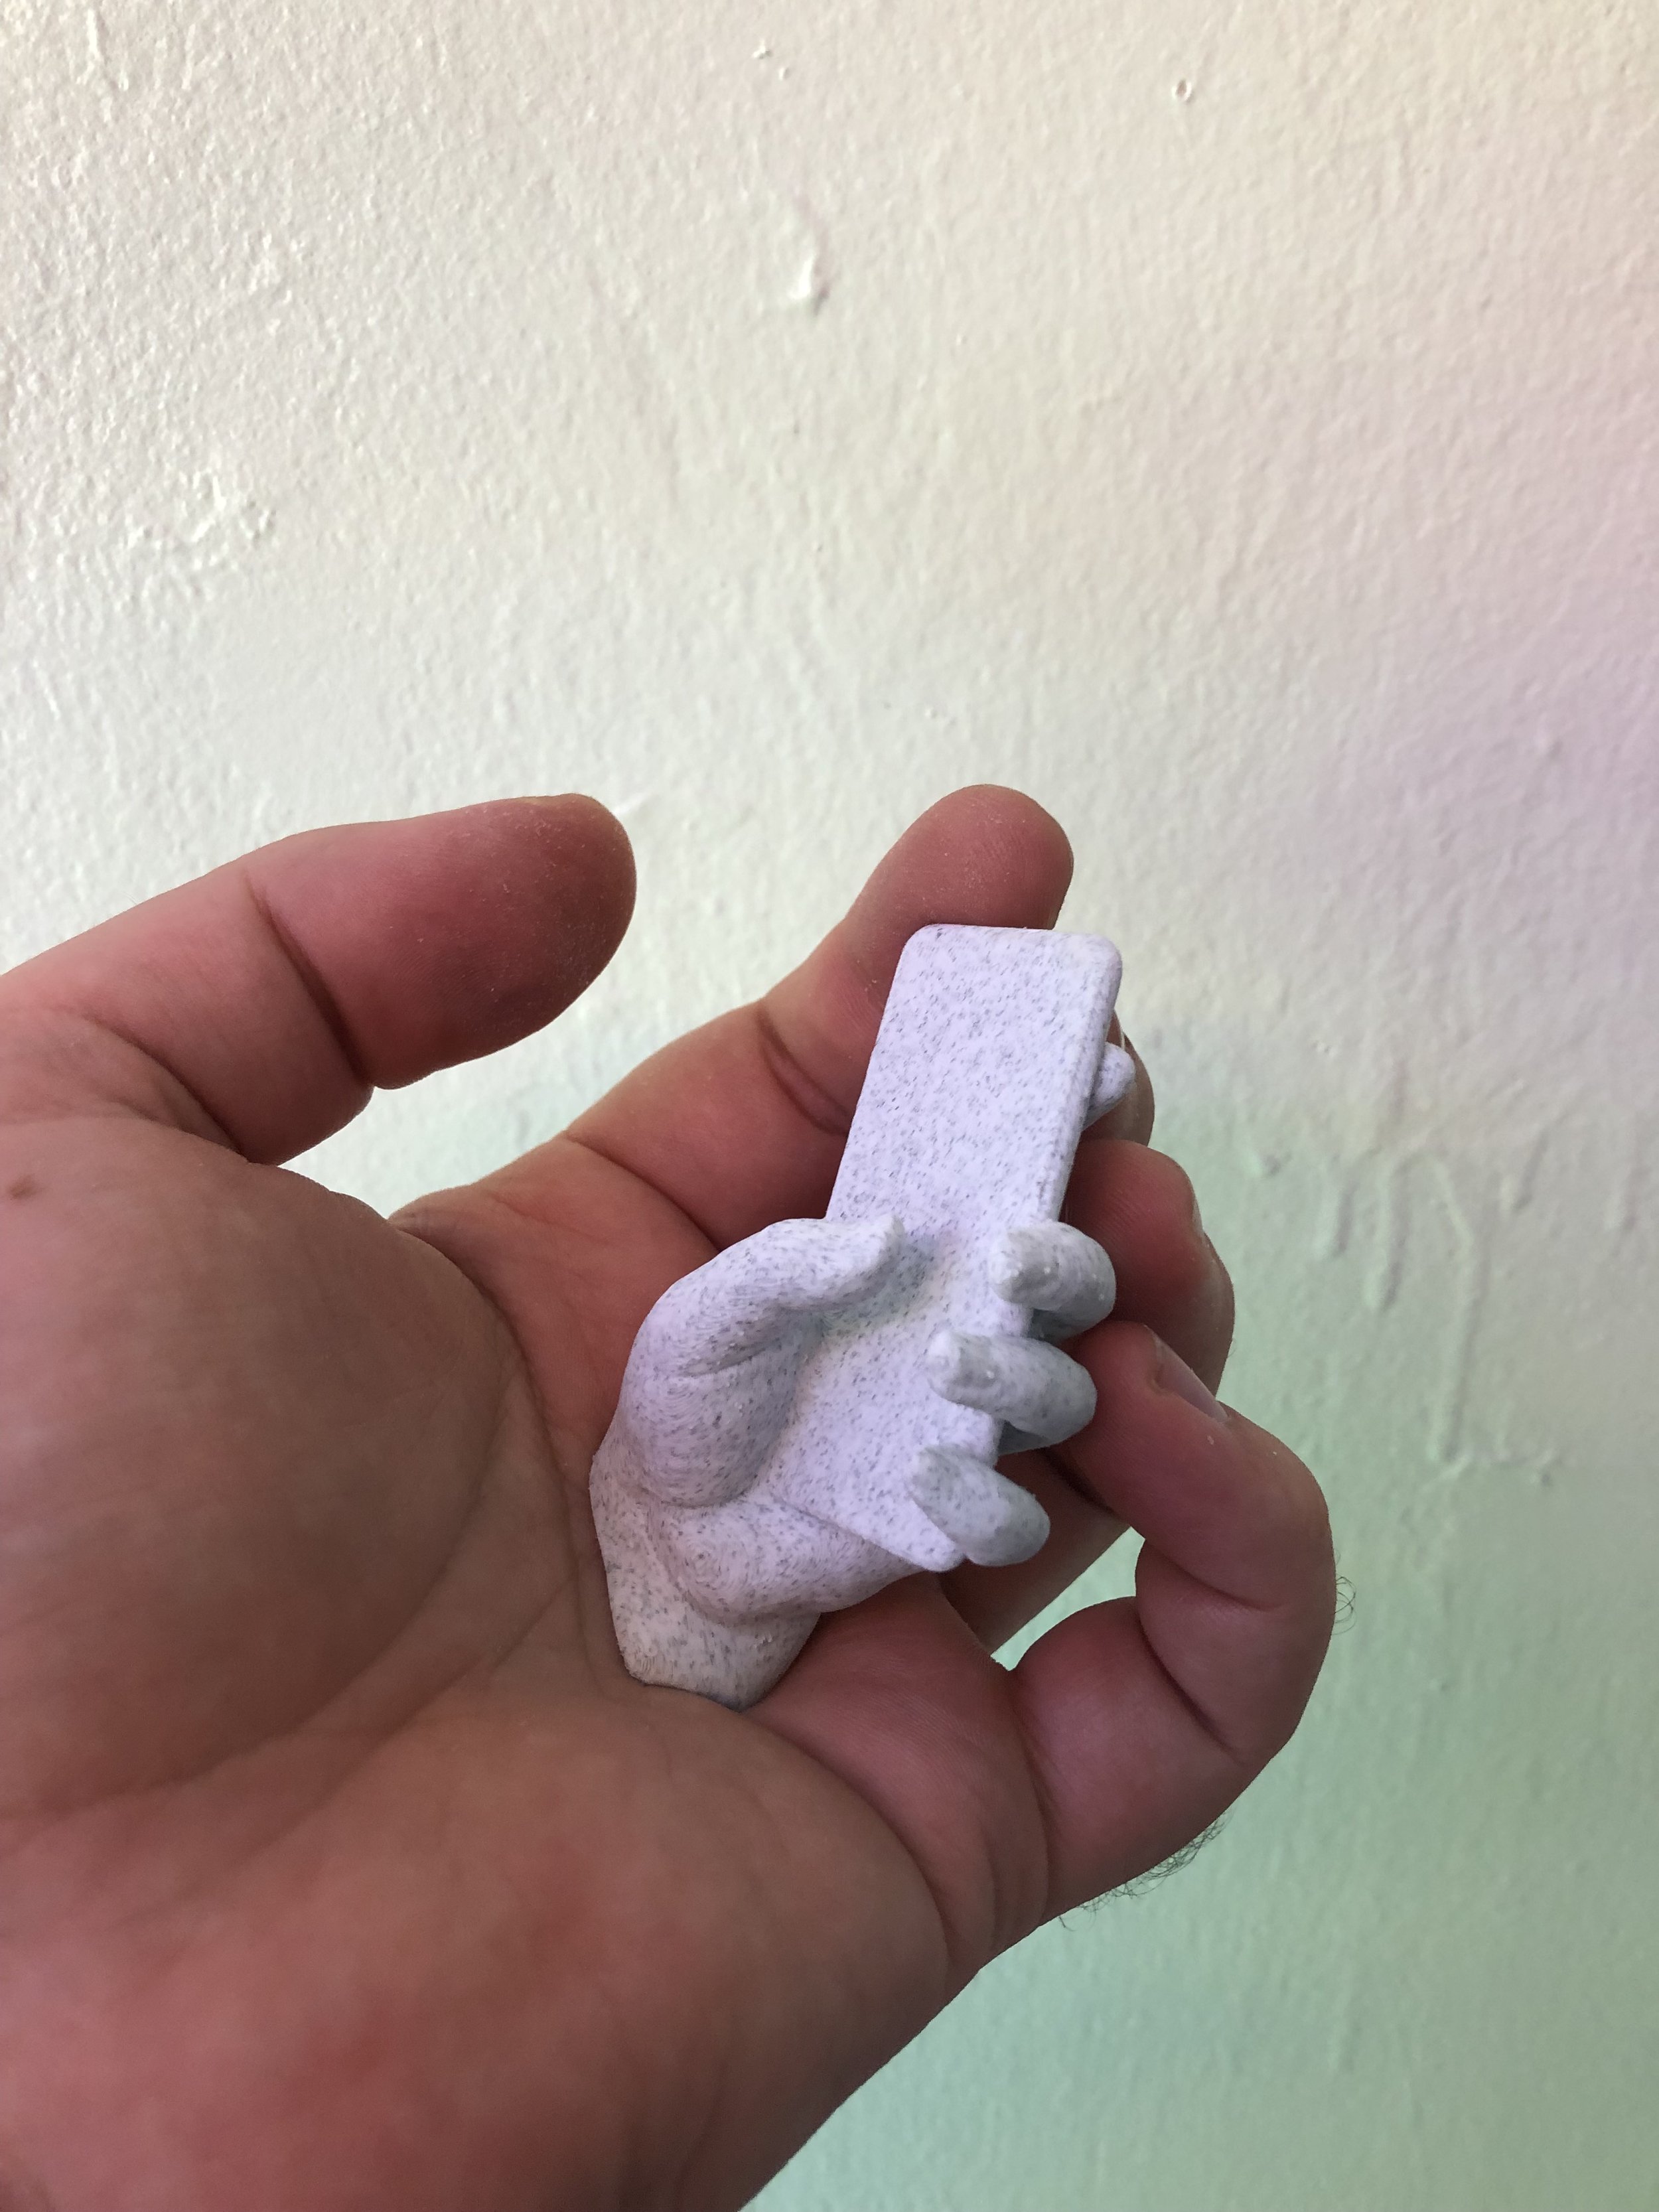
My artwork outside of this class deals with the effects of rapid technological accelerations on the human body, psyche, and social sphere. This typically manifests as life casts of disembodied hands interacting with phones, laptops, and screens; often in an active process of entropy, decay, or fracture.
For my final project, I wanted to begin with high resolution 3D scans of my sculptures with the goal of augmenting, glitching, and complicating them through computational processes to be output as 3D prints. This scanning has a dual function: 1) making virtual assets of my sculptures for new realms of VR, AR, and virtual exhibitions, and 2) making 3D printed sculptural works that would be otherwise difficult or impossible with traditional mold making techniques. The 3D scanner did an excellent job at accurately capturing the exterior surfaces of my plaster sculptures, but it struggled to pick up any interior surfaces between two objects. This limitation of the scanner began to highlight what I can achieve through traditional sculptural processes that I can’t accurately replicate in digital processes, and what I can achieve with digital fabrication techniques that I cannot approach with my own unaided hand. Each skill set has it’s place and function, and they can be harmonious with enough effort. This duality of digital fabrication and traditional craft emerged as a core theme of this class, and an increasingly critical part of my artistic practice. I aim to use my new digital fabrication skills and my traditional sculptures skills in tandem.
In all of the 3D prints in this project, I aimed to embrace the digital processes of collision, glitch, computational noise, and fluid distortion. I aimed to make 3D prints that would be impossible, or very difficult, with only traditional sculpture techniques. I am fascinated by the tension between human forms and the mathematical complexity of infill patterns and support materials. I’m interested in this friction where one can’t immediately tell what is “natural” or computational. I aimed to reveal the internal structure of the slicer as a generative aesthetic component, which is often completely invisible and strictly utilitarian.
Artistic Inspirations + Precedents
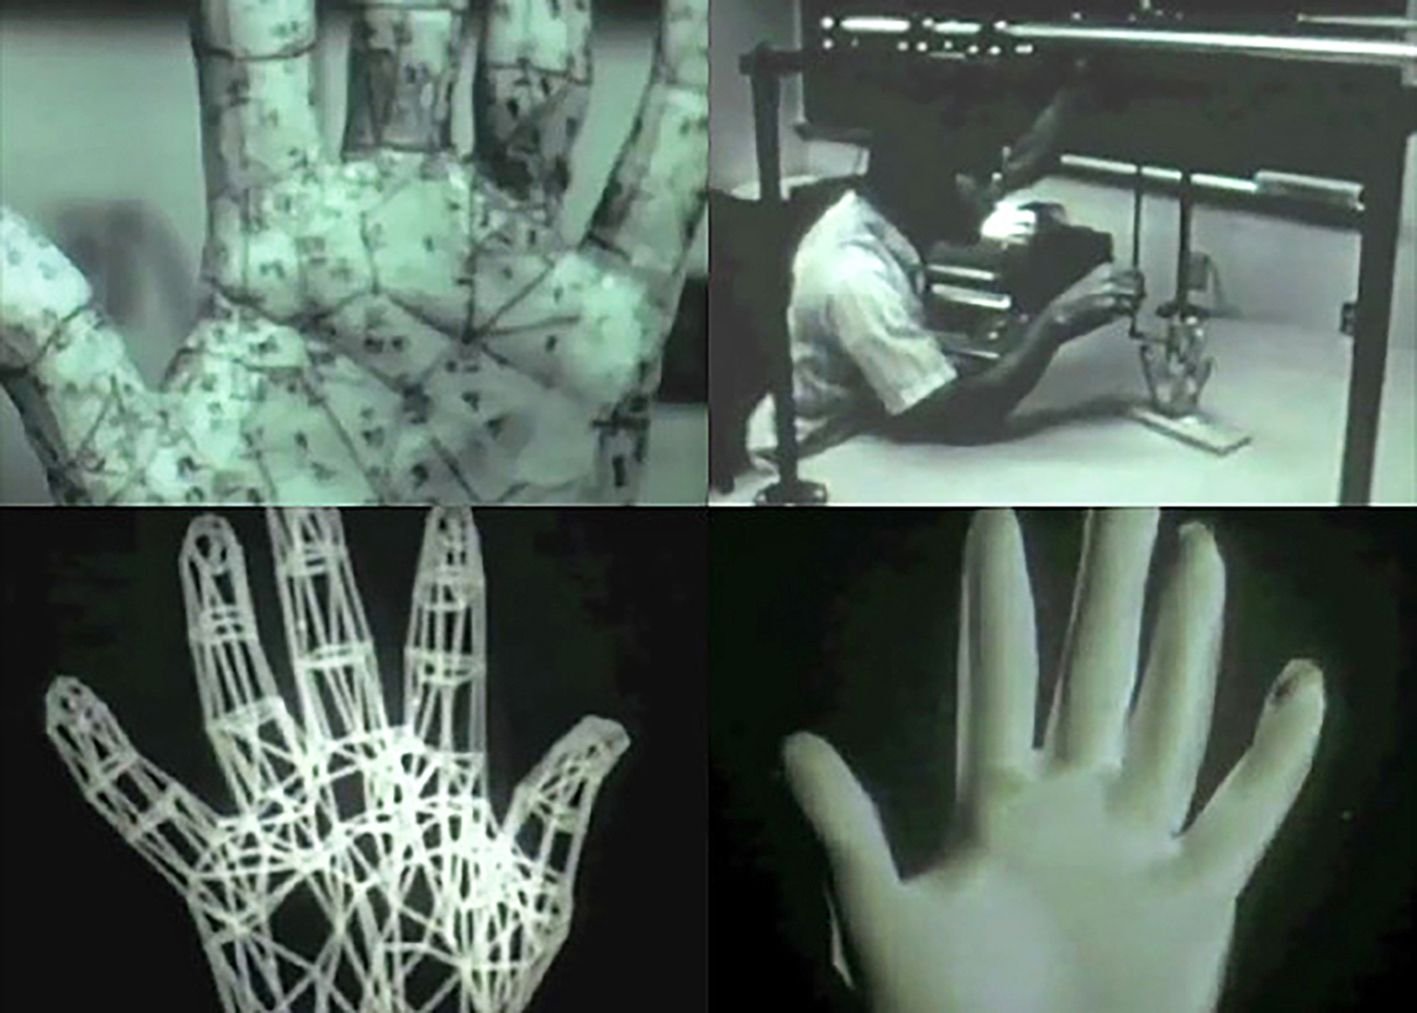


1) My use of the hand as a point of contact between humans and the digital world found new resonance after seeing one of the first polygonal computer animations Computer Animated Hand (1972) by Ed Catmull and Fred Parke. 2&3) I love David Altmejd’s work, and particularly the way the series above uses fragmentation, multiplicity, and kaleidoscopic vision to reference altered states, motion, or the passage of time. Early cave paintings are also a good example of this pictorial representation of movement and time. This directly inspired my decision to print multiple staggered collided meshes. 4&5) I have been inspired by Timur Si-Qin’s use of 3D printed supports, seen here at larger than life scale. I’m unsure whether this is printed on a giant 3D printer, or if he is using the aesthetics of additive manufacturing using traditional sculptural techniques. I like this confusion and suspension of disbelief. I’m echoing this aesthetic with many of my prints, on a much smaller scale. I hope to one day realize works at this scale. 6) Urs Fischer’s CHAOS series depicts 500 unique collisions of two everyday items. These digital collisions inspired my experiments in colliding meshes. 7&8) These works are life sized candles that deteriorate as they burn. I’m unclear whether the casts were made from digitally fabricated positives, or if they were traditionally sculpted. Either way, the collisions reference digital materiality.
PROCESS
3D Scanning:
The video above shows the process of 3D Scanning a plaster cast with the Artec Space Spider in the Art Department 3D Lab. This process includes scanning each object from multiple orientations, aligning the different scans in the Artec Studio software, merging them, manually cleaning up artifacts in the mesh, and making the mesh manifold. Cast plaster scans very well, as it contains a high level of detail, has a uniform matte surface finish, and can stay completely still for easy calibration. I like the visuals of this scanning process, and began to screen capture the scan to use in a future video project.
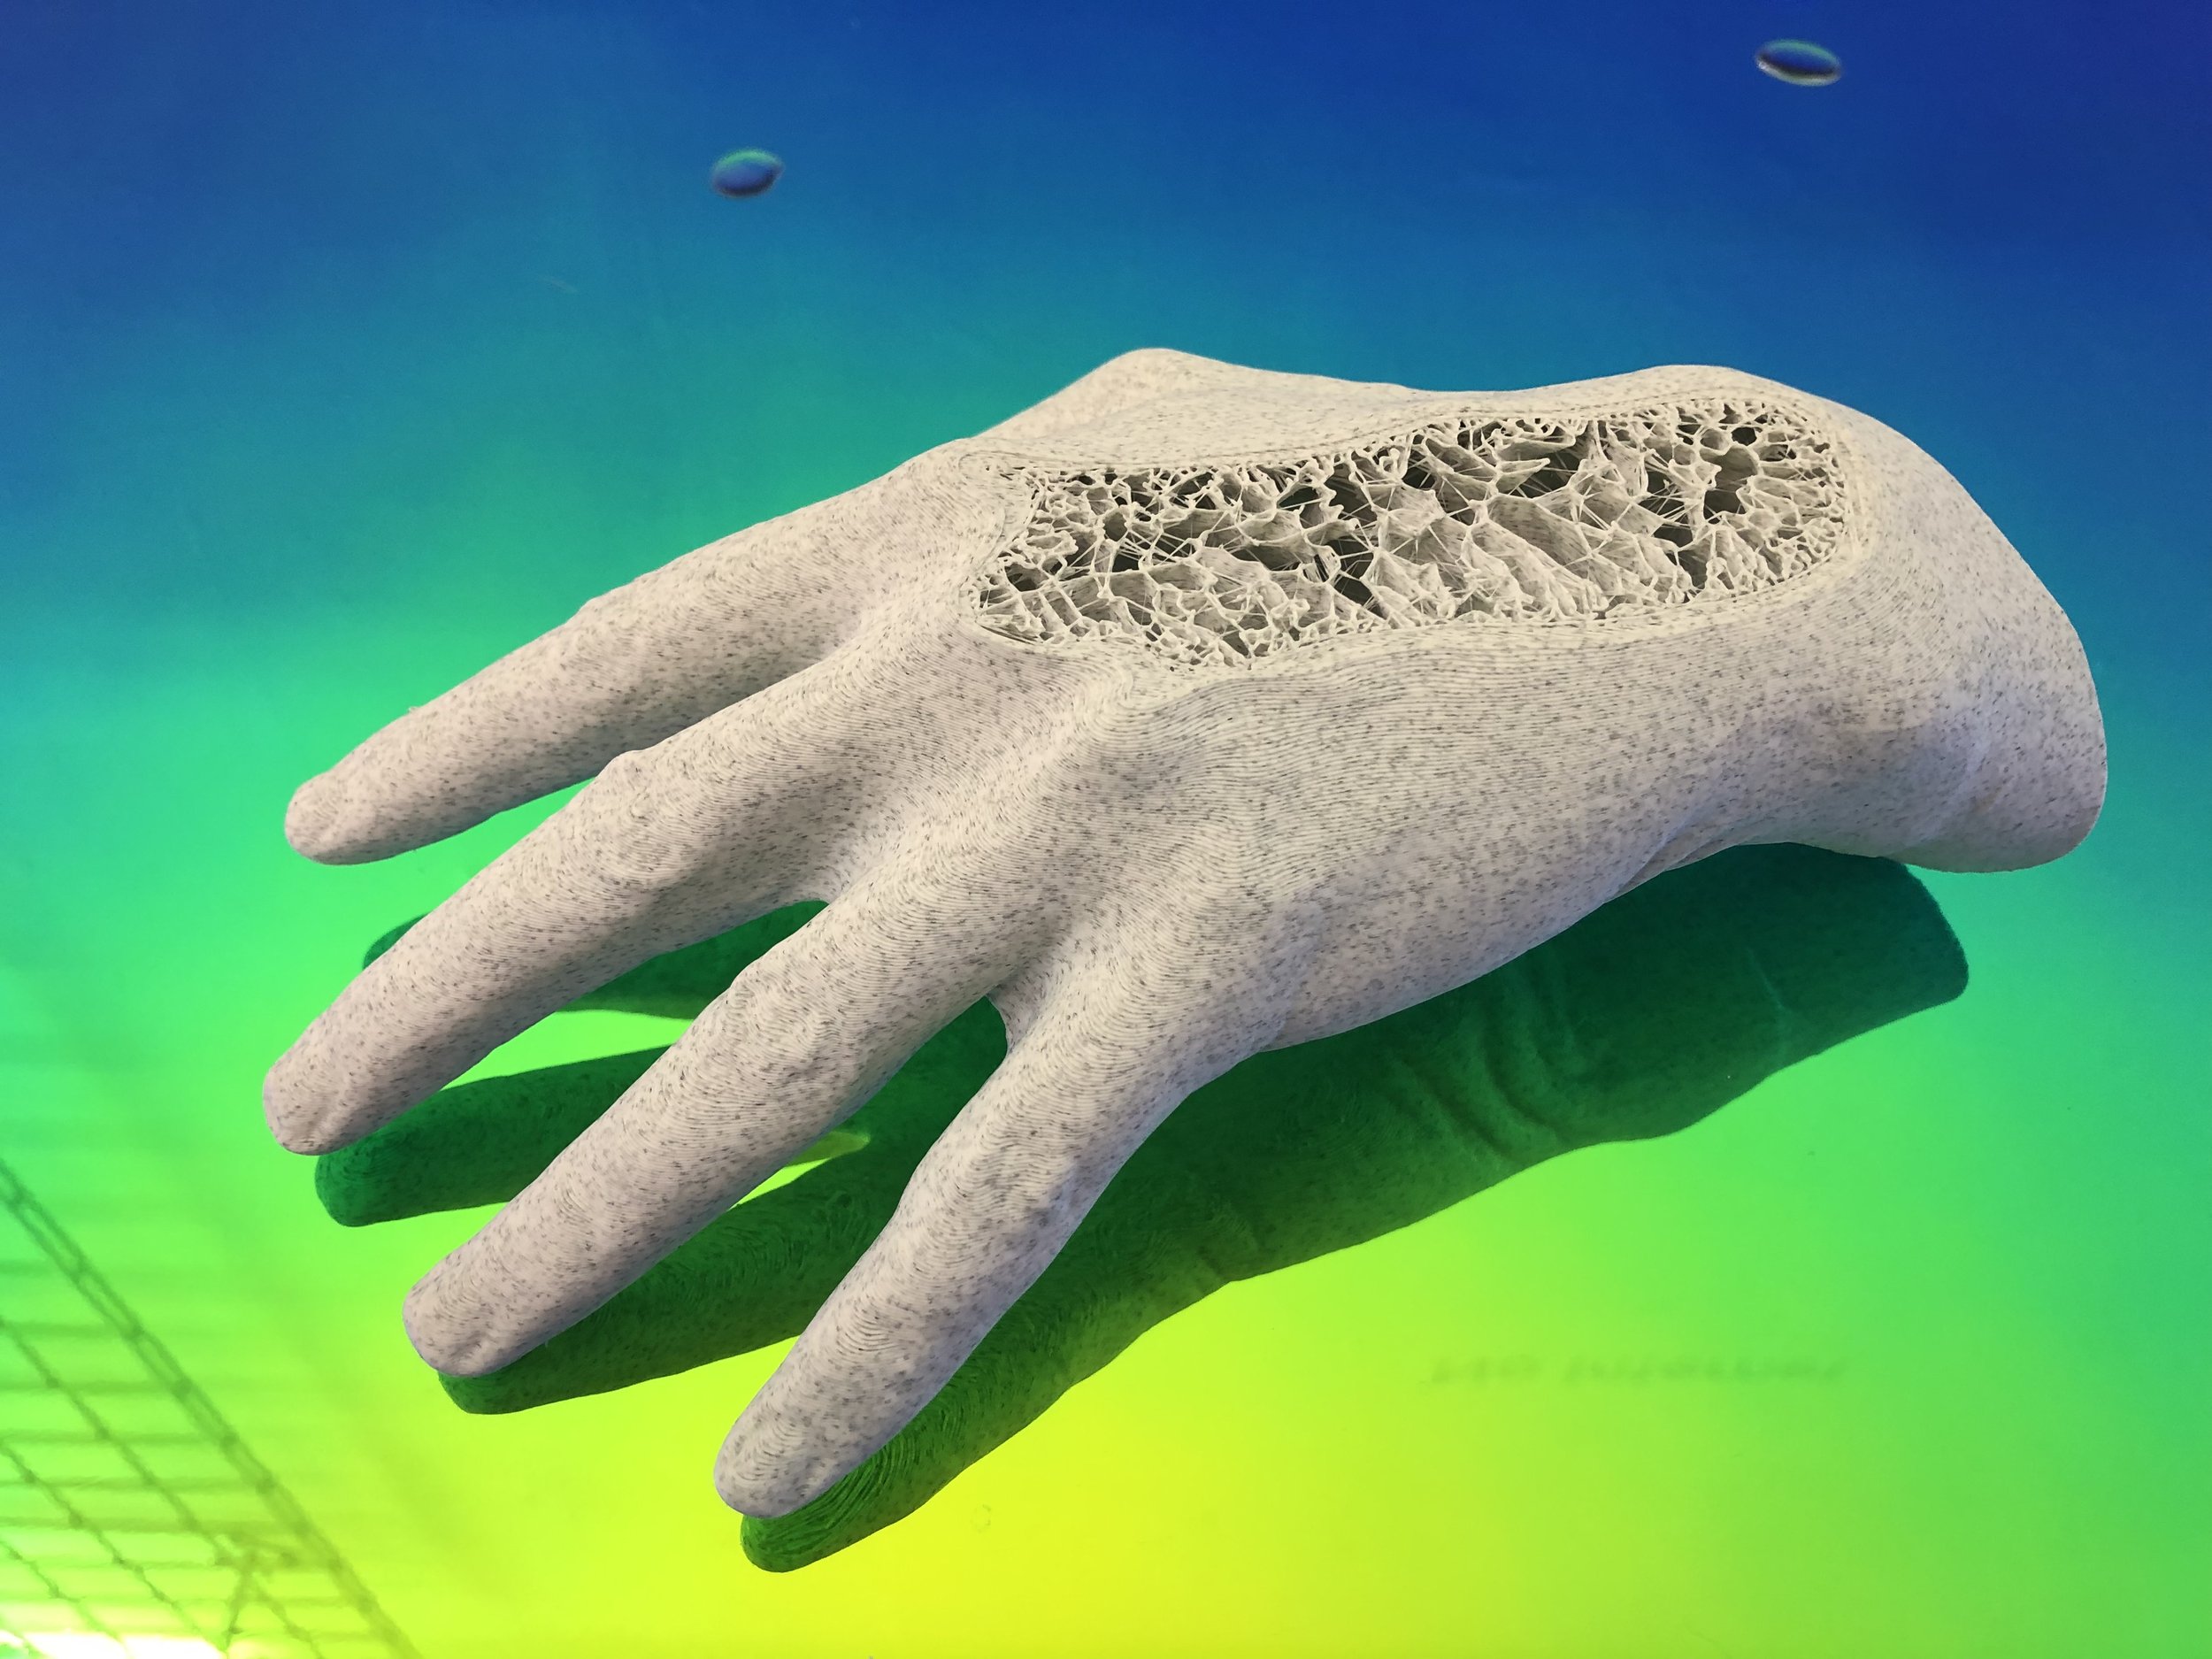
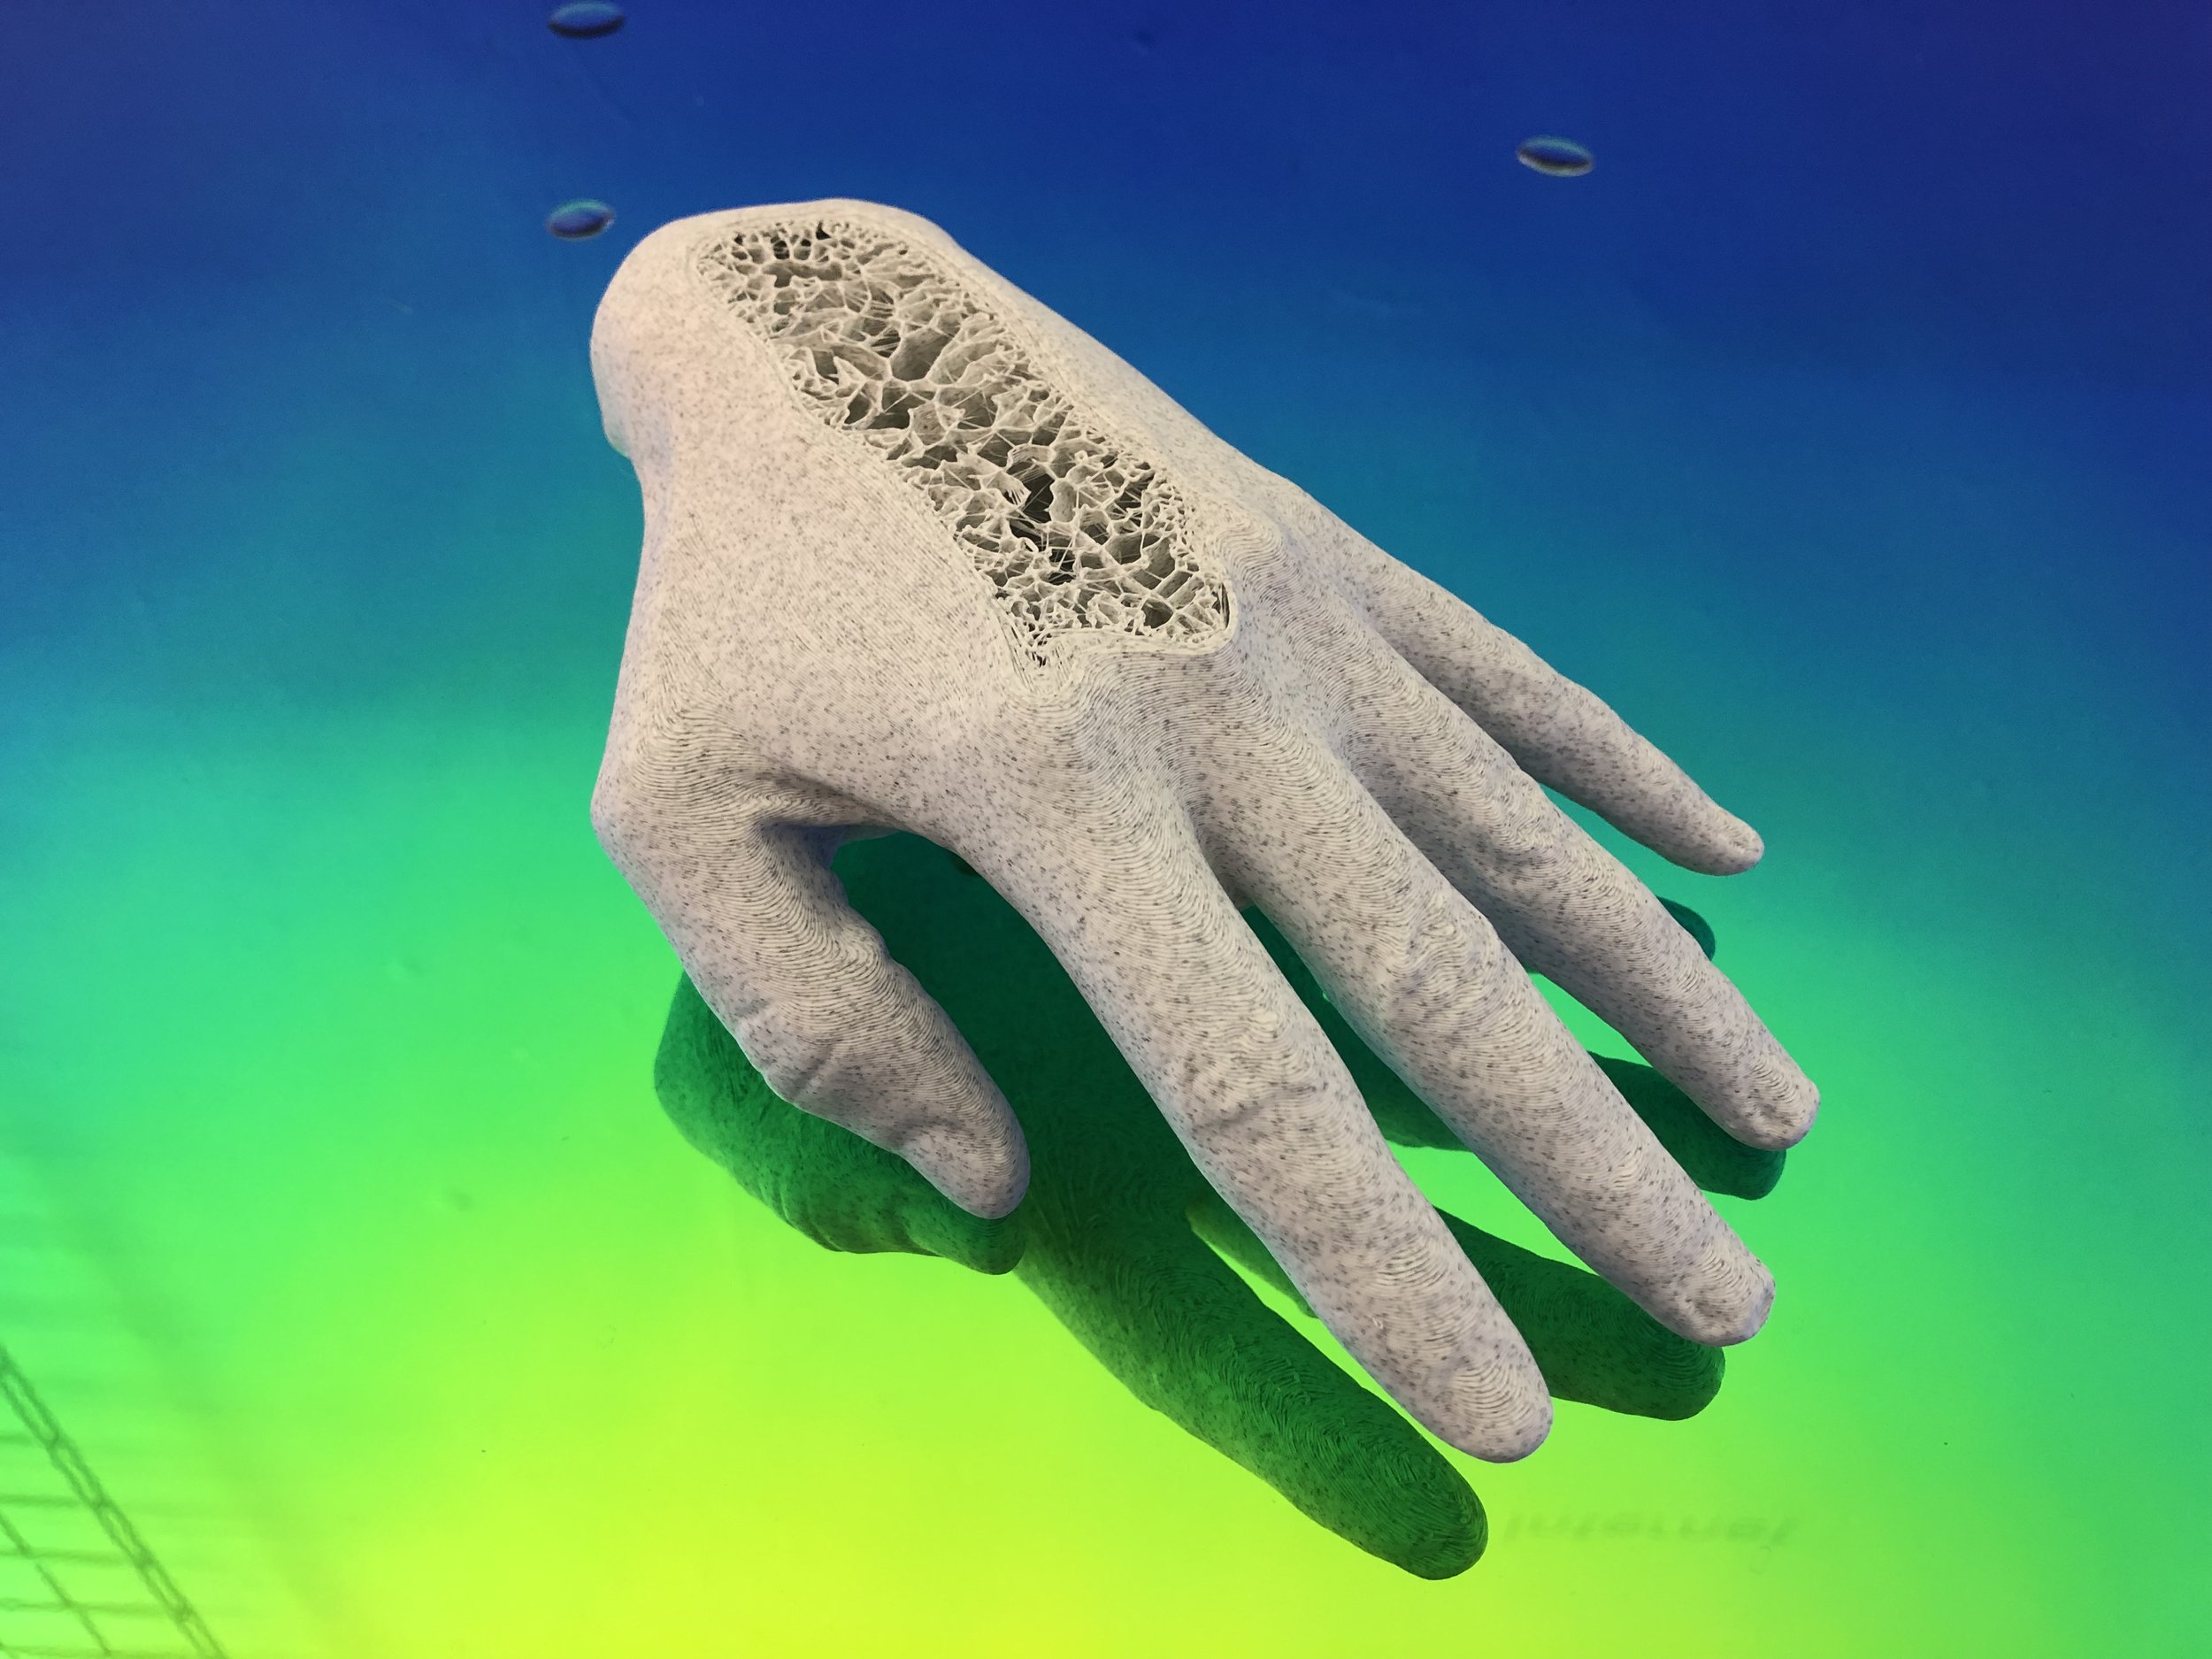
3D Scan Results:


The images above show the raw meshes exported from Artec Studio. I did some manual clean up, smoothing, and sculpting in Blender. In the first scan, the shadows cast by the finger tips resulted in slight reliefs on the surface of the phone screen, which I had to manually flatten and smooth in Blender. The second sculpture had too many artifacts on the interior between the two hands that I decided not to print it. I spent a good deal of time trying to clean up this mesh with the sculpting tools in Blender, but ultimately wasn’t happy enough with the results to print. Because the scanner was not able to see into the interior past the closest surface, these interior surfaces autofilled as big blobby masses. The models have a high level of detail, much higher than the apps I had used previously, and the photorealism comes from a texture map generated by the 3D scanner. This final level of textured detail is seen in the screen space, but does not translate into the surface of the 3D print. Nonetheless, I was quite pleased with the level of detail in the 3D prints. This detail can be accentuated by larger print scales, finer detail settings in the slicer, and PLA choice.
Texture Map Artifacts from the 3D Scans:


Totally a side note, but I like the texture maps that the Artec Studio scans generate. The Trnio scans I have worked with in the past have very different texture map formatting (much more geometric), and these texture maps look almost like a painting made by a neural network. I may make inkjet prints on canvas or silk in the future.
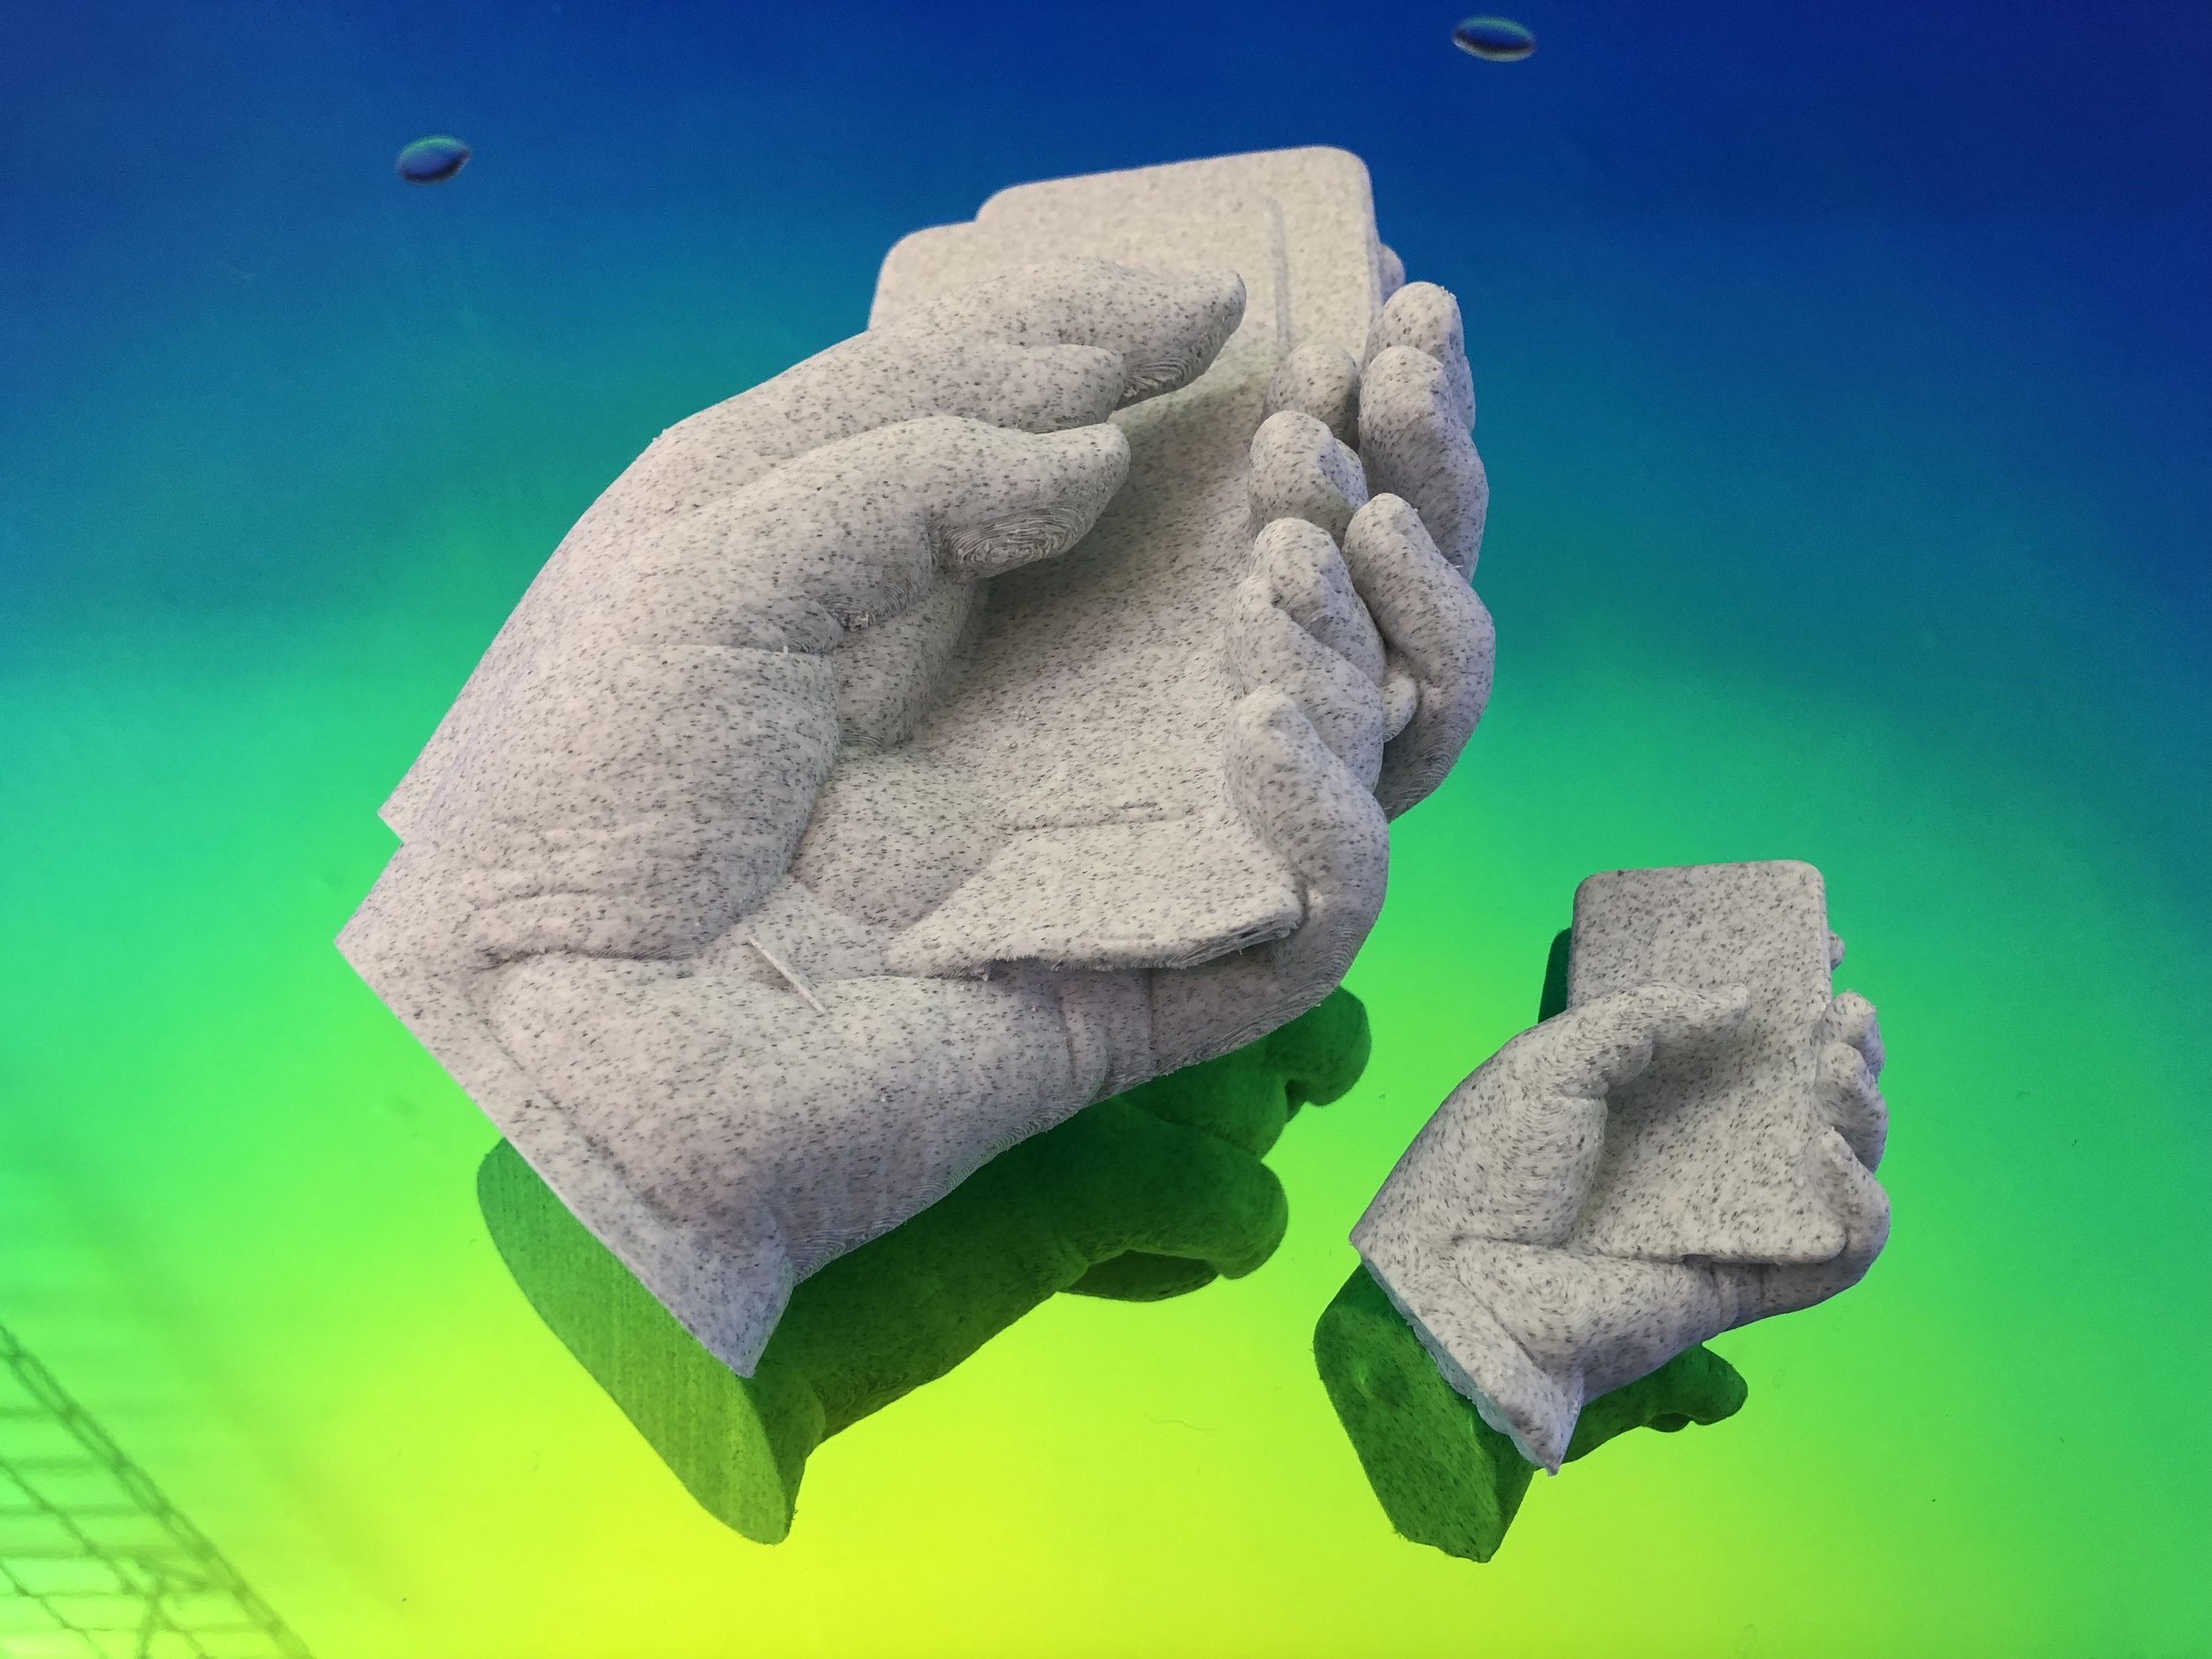
Mesh Manipulations in Blender:


The images above show mesh manipulations, sculpting, and modifiers applied in Blender to achieve the final models that I output to the 3D printer. The model of the hand holding the phone used a boolean difference modifier to plane slice the wrist, and smoothing and sculpting tools to fix slight irregularities in the scan. I then duplicated the model, composed the collisions, and performed boolean unions between each mesh to get a manifold mesh for the slicer.
The second composition of the intersecting hands has one pixelated (voxelated?) hand that was achieved through a “remesh” modifier, and I experimented with different “octre” values to adjust the resolution of the pixelation. I was trying to visually stress the digitization of humanity, but it also reminded me of the surface texture effects we got with Mert’s clay patches.
The wavy hand was achieved through the “elastic deform” brush in Blender’s sculpt mode, to deform the mesh. I didn’t have time to print this model, but would like to print it in the future to start exploring these digital deformations. For the final mesh, I decimated the mesh to a more simplified polygonal form, and then used a “wireframe” modifier to make the geometric structure of the mesh. I was thinking specifically of the Computer Animated Hand by Catmull and Parke, and had plans of colliding this wireframe with the original detailed model. I was unable to successfully slice this model, so I do not have a 3D print of it. If I ever get a sliceable mesh. I will probably need to use PVA as infill to get these delicate lines without having to remove supports. It could also be interesting to try printing this mesh on a resin printer.
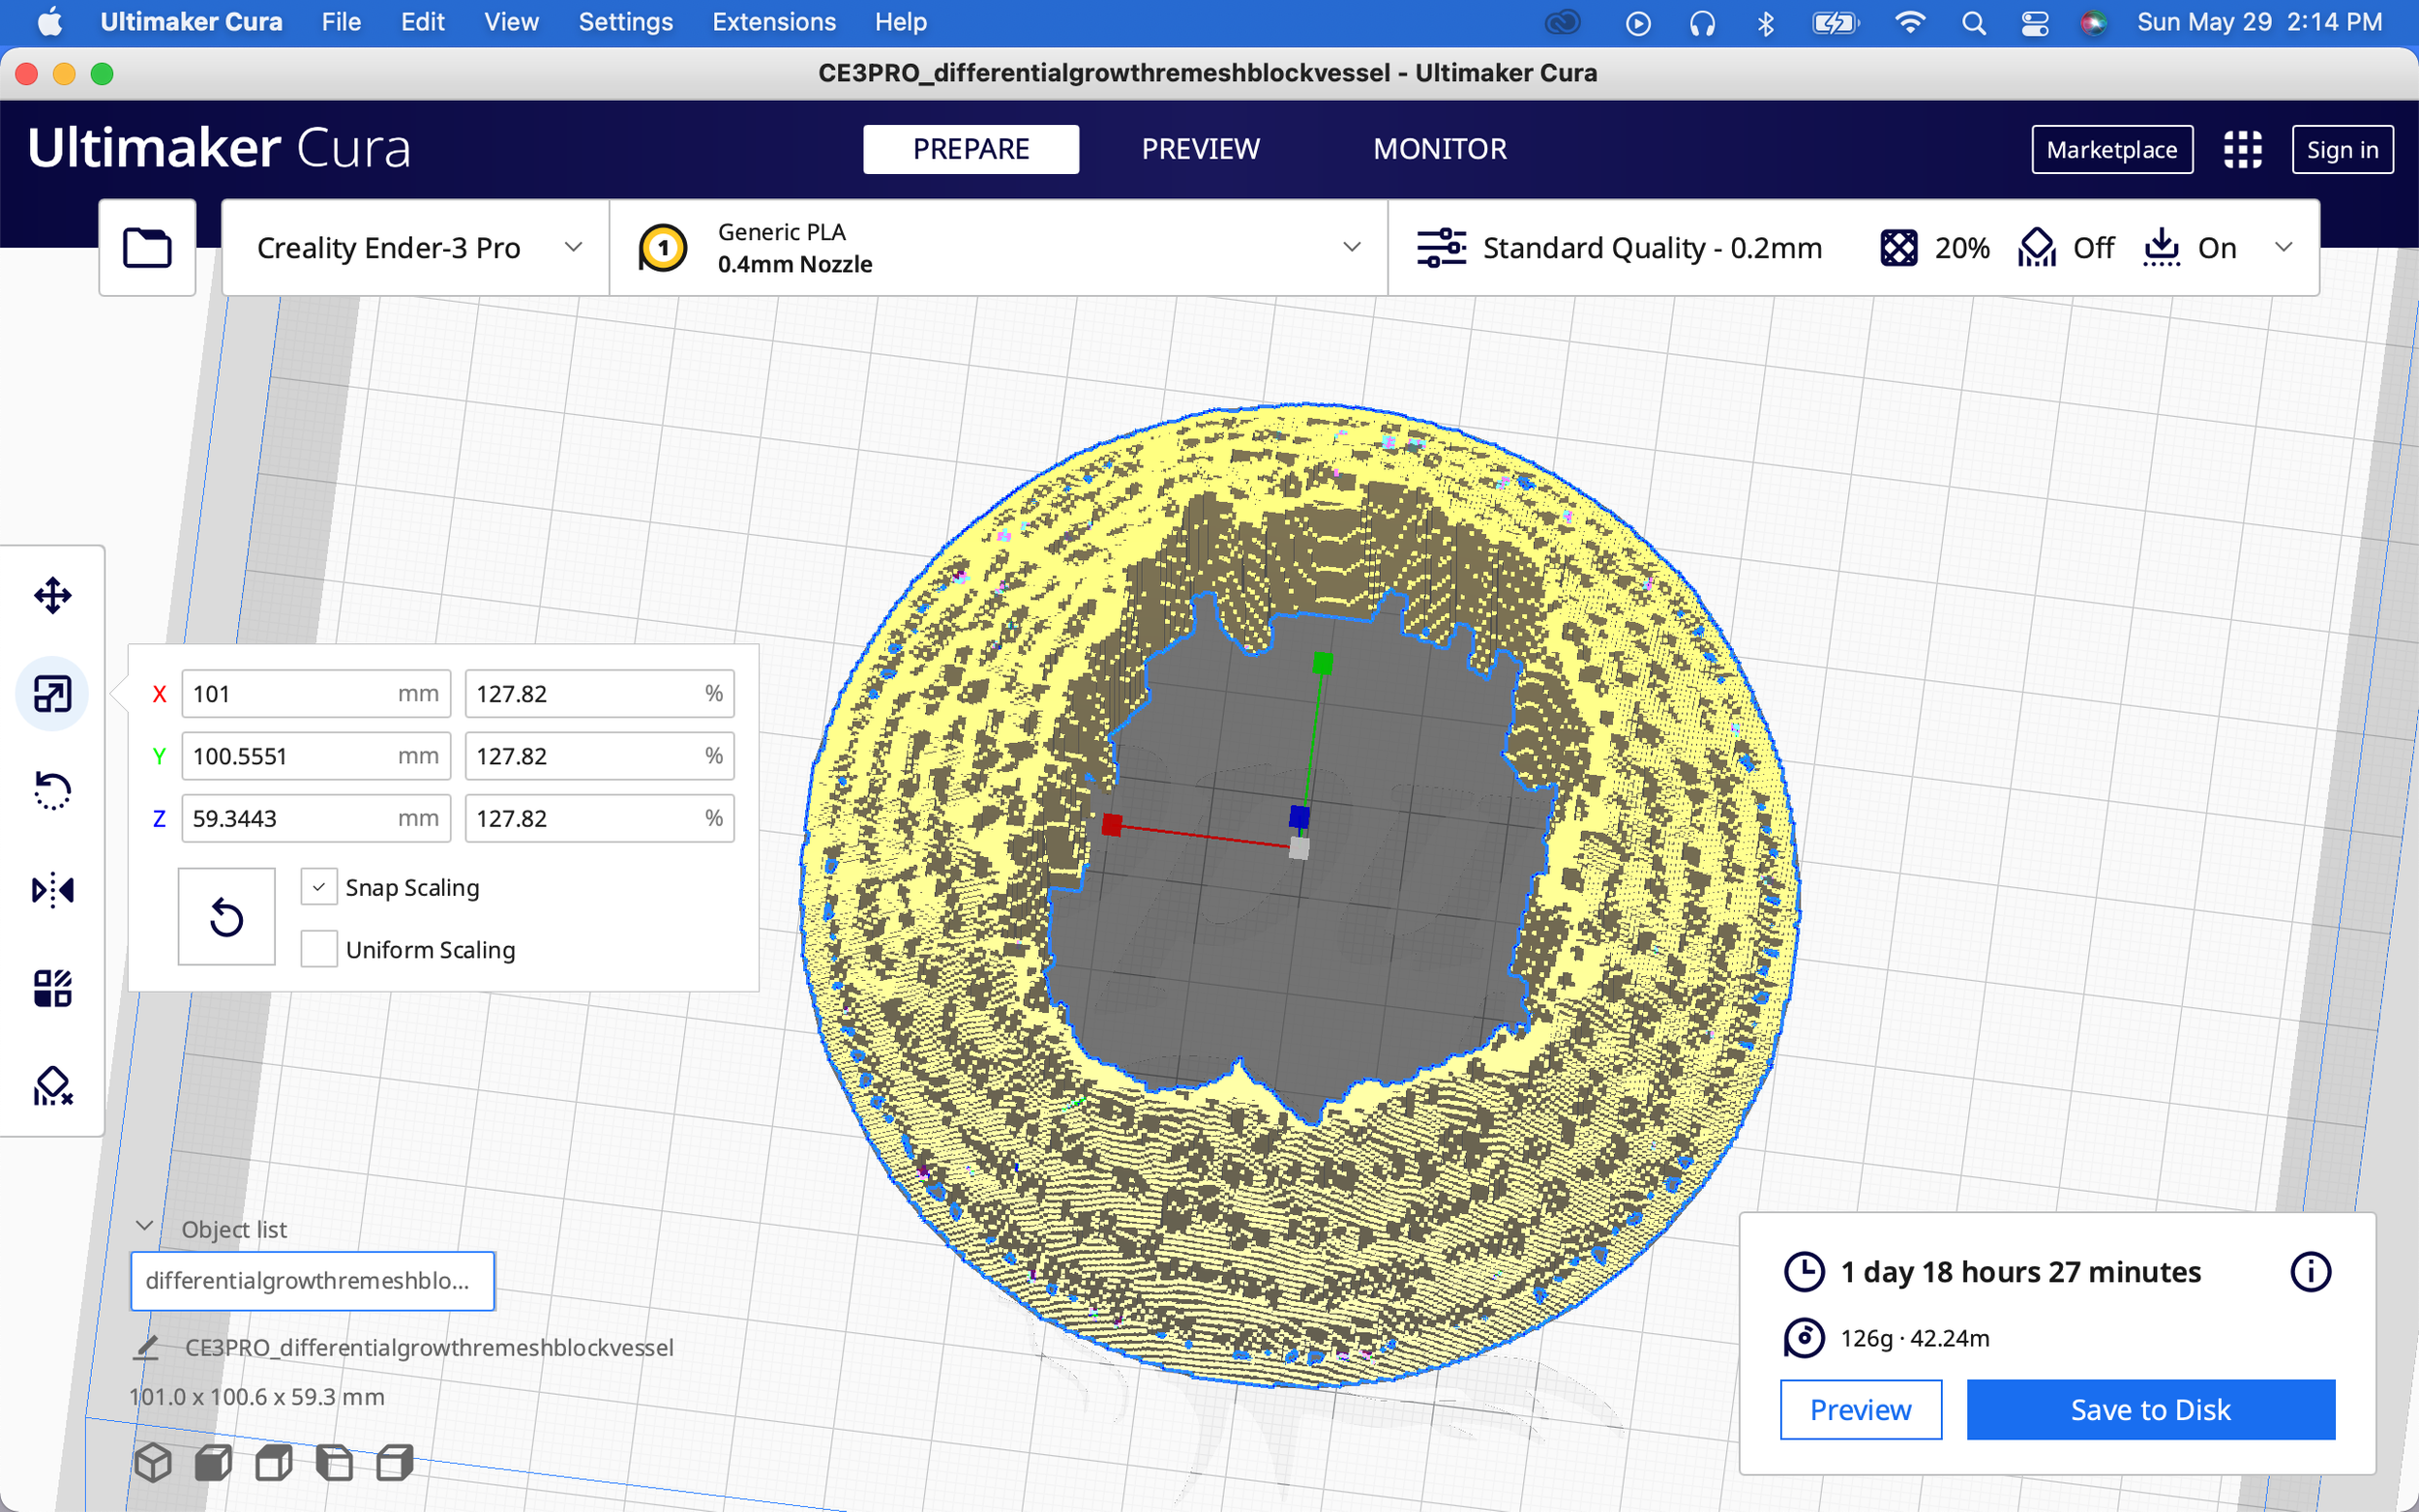
Sliced Models in Cura:


After performing boolean unions on my overlapping meshes, I had success slicing almost all of my models. I focused a lot on Cura settings in this project, and really gained a lot more control. These were definitely the largest prints I have made on my own, and this project forced me to get comfortable with overnight or multi-day prints. After the first successful overnight print, I relaxed a lot about it, and then printed overnight prints almost every day. I started to settle into a nice workflow, where I could schedule prints efficiently.
3D Printing Process:


I really enjoy the process of 3D printing, and get new ideas from watching the prints in progress. I’m often tempted to pause a print because I like the way it looks mid print with the infill and supports exposed. Typically, I take pictures and notes of these moments, and they often become the starting point for future prints. I really like the generative patterns that are formed by the “tree” supports, and have ideas to print just these extrusions at which point I would fill them with plaster or scan on a flat bed scanner to become an SVG for a future print.
Cura Infill + Support Settings as Generative Design Elements:


A main focus of my project was exploring and integrating infill and support geometry into my final prints. The first slice shows my sketch for exposing the “lightning” infill pattern by pausing the print at a specific layer height. I also planned to fully expose the lightning infill by printing the shell of the model in PVA, but unfortunately that print failed multiple times. I’ve included my logic in the slicer settings, printing the supports in PLA (for cost saving), the shell in PVA (to be dissolved), and the infill in PLA, ideally only the delicate lightning infill would remain. This should work on paper, and I think it is worth pursuing again after this project.
I printed cubes with lightning infill in a range of sizes. My idea was to pour resin into these forms to encapsulate the lightning infill pattern, and then to manually remove the walls of the print once the resin had cured. Similarly, this should work on paper, and is worth pursuing again, but I had numerous issues with the resin tests, as I will explain below.
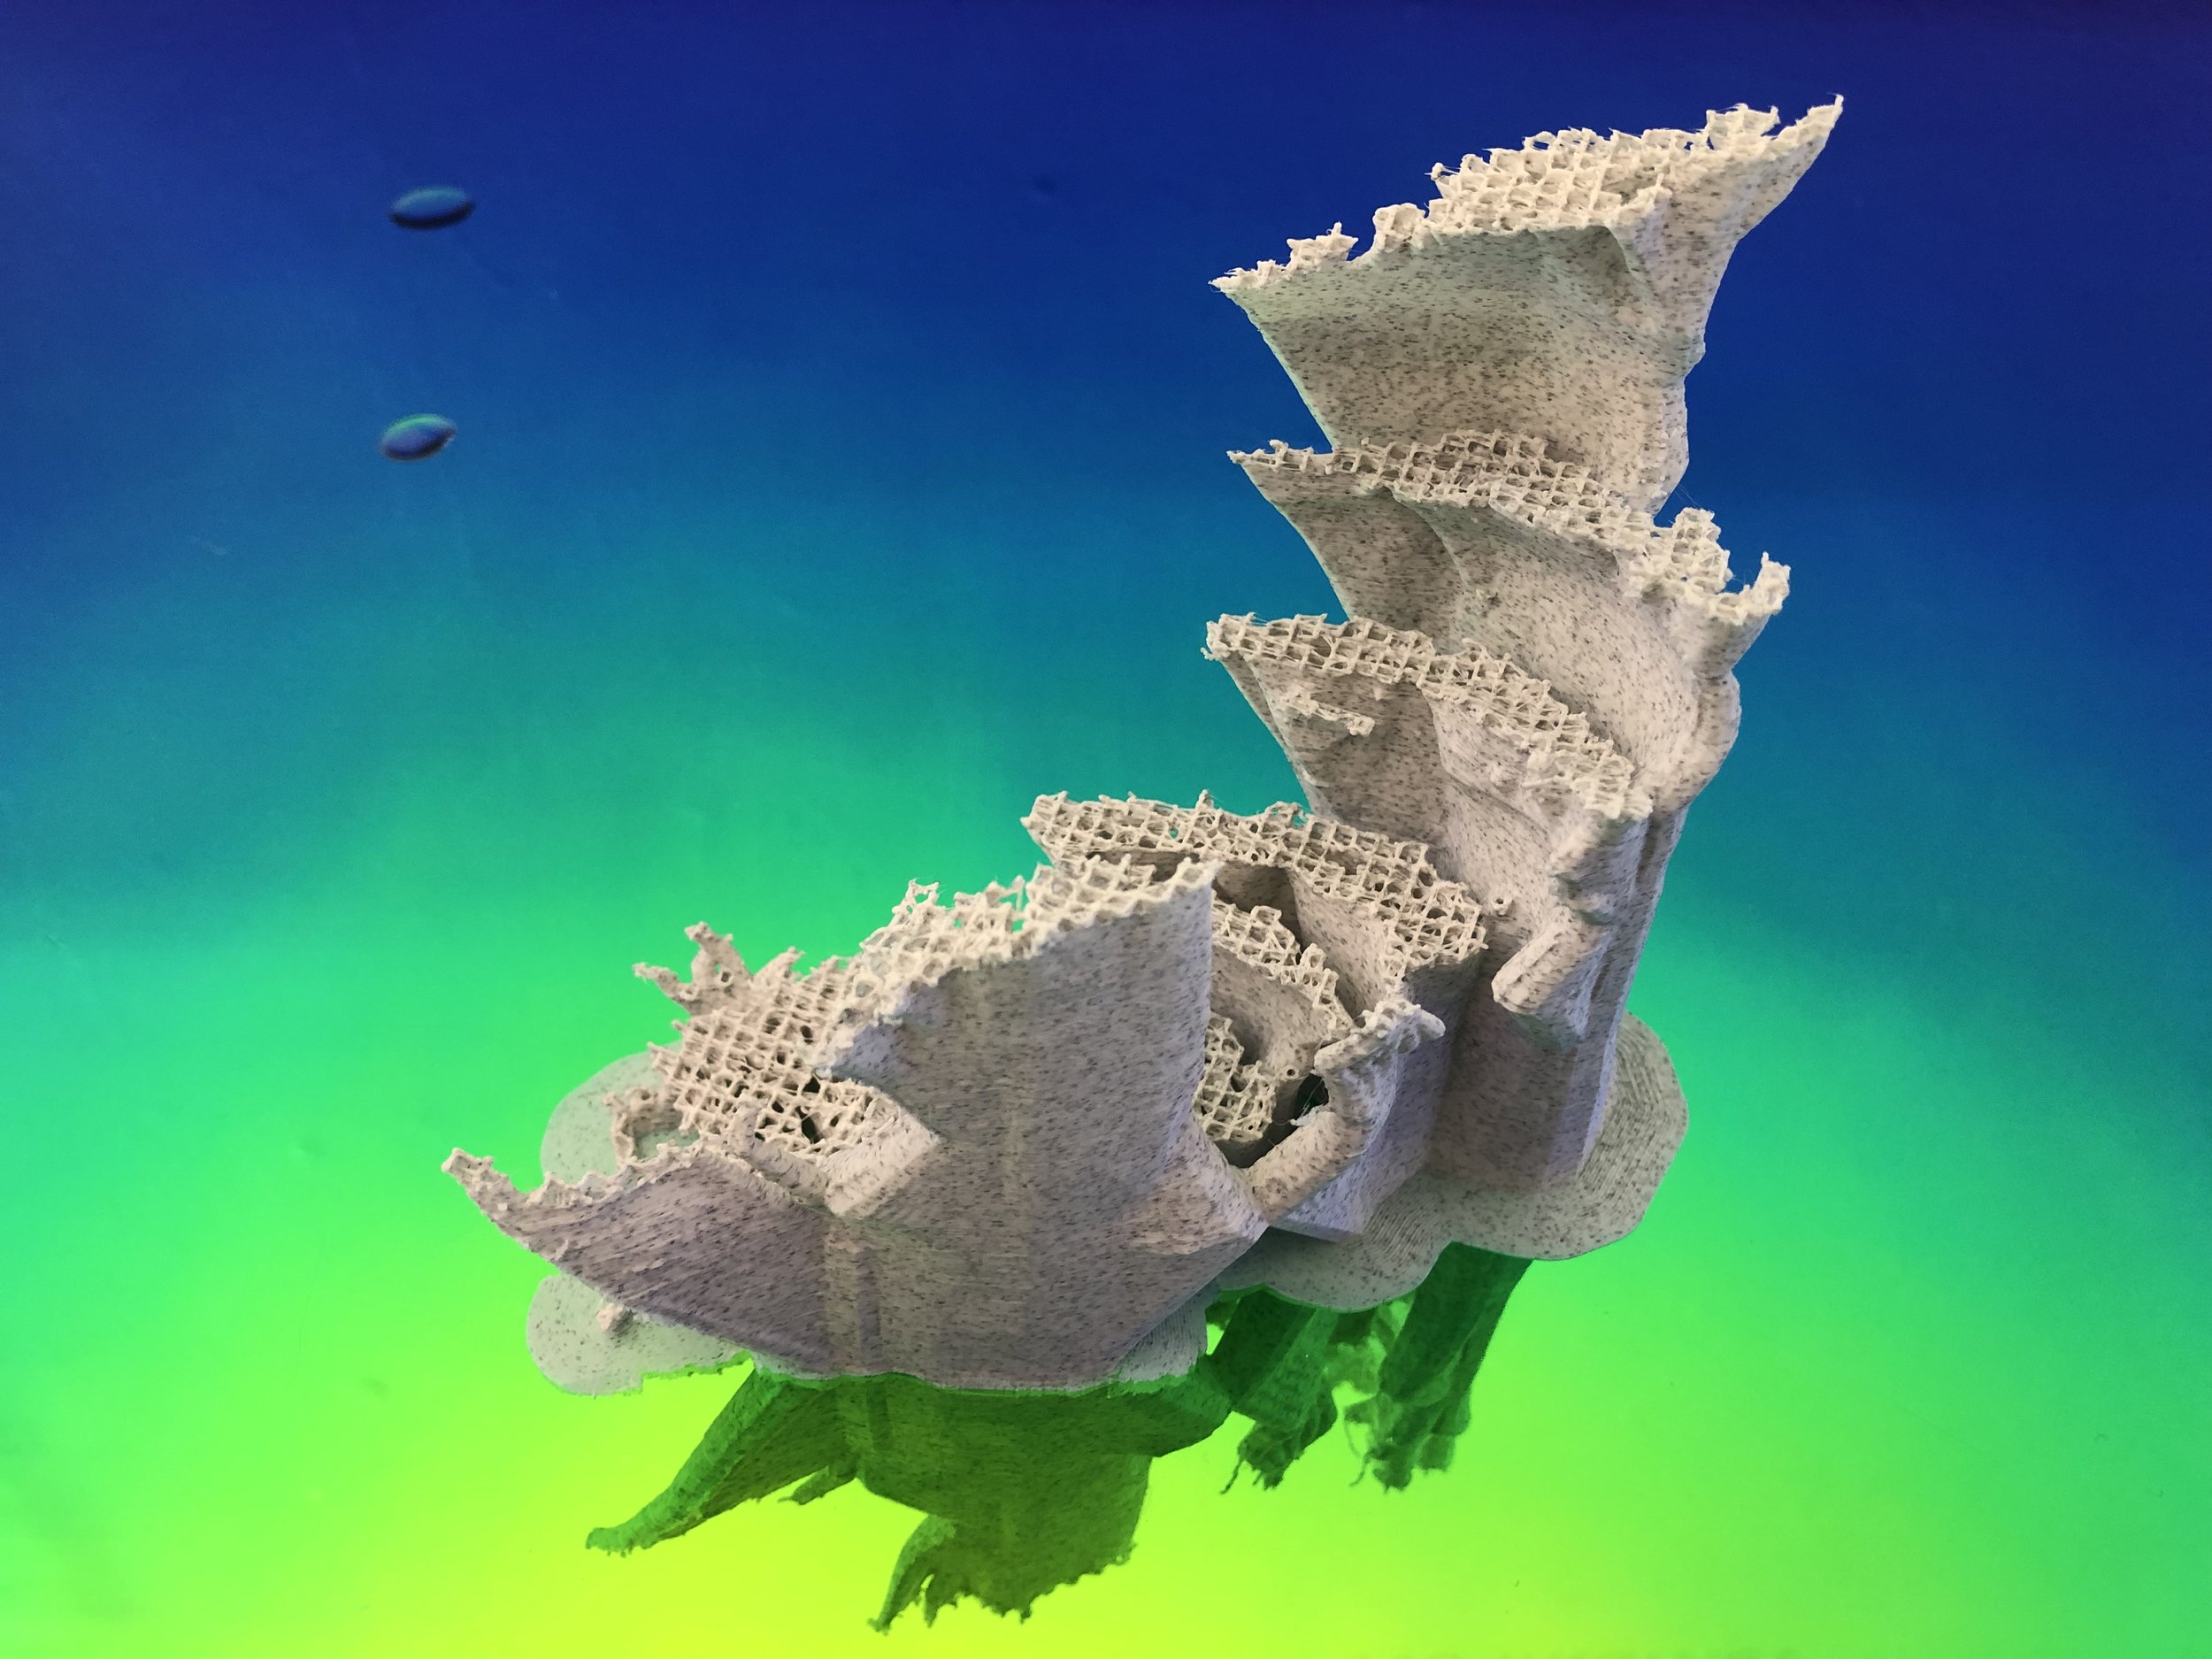
I have been fascinated by the generative designs that Cura generates for supports (particularly tree structures, which echo the differential growth patterns of Mert’s Grasshopper patch and the “branchy” structures in Dream Lens) and infill (particularly the new “Lightning” infill setting). Often, I am as interested in these mathematically generated supports as I am with the model I am printing. More acutely, I am interested in the intersections of these models and the generated supports. These infill patterns are extremely delicate when exposed, so I may need to experiment with settings or alter the Gcode to make them more robust, or perhaps I pour resin into the forms to suspend the infill before removing the walls. I may strategically just stop a print at a certain layer height to expose the infill patterns.
Bases:


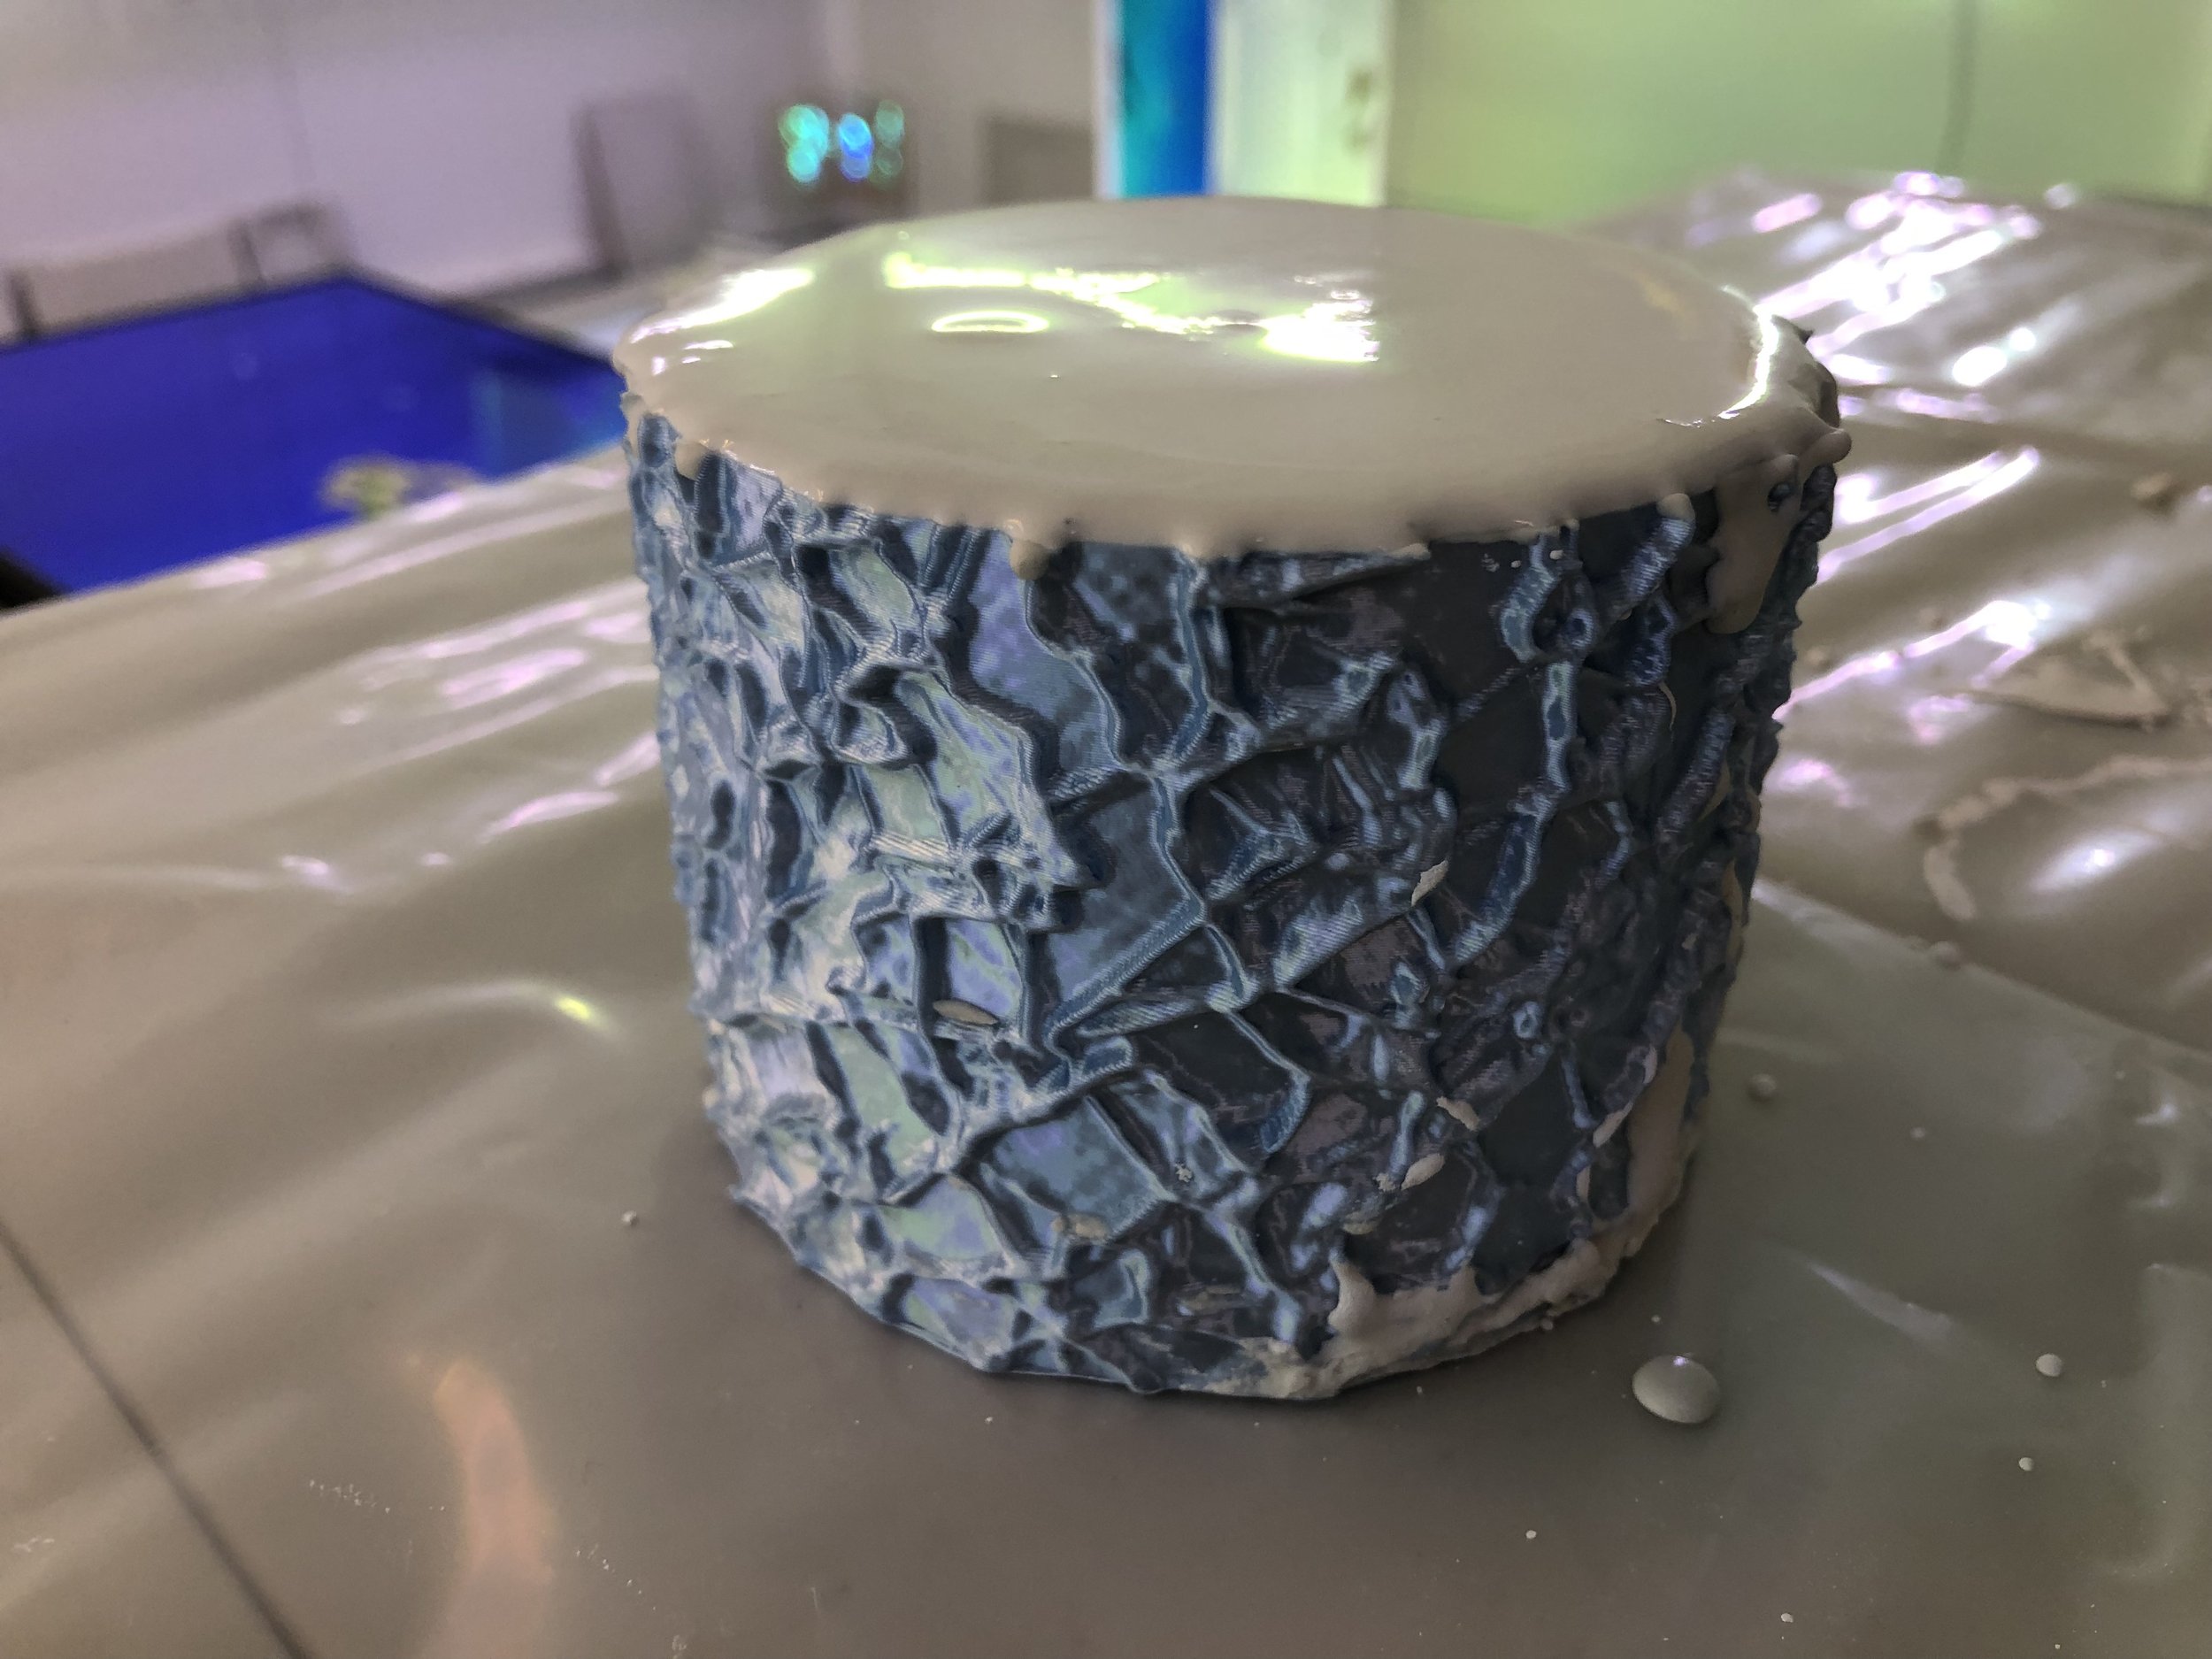


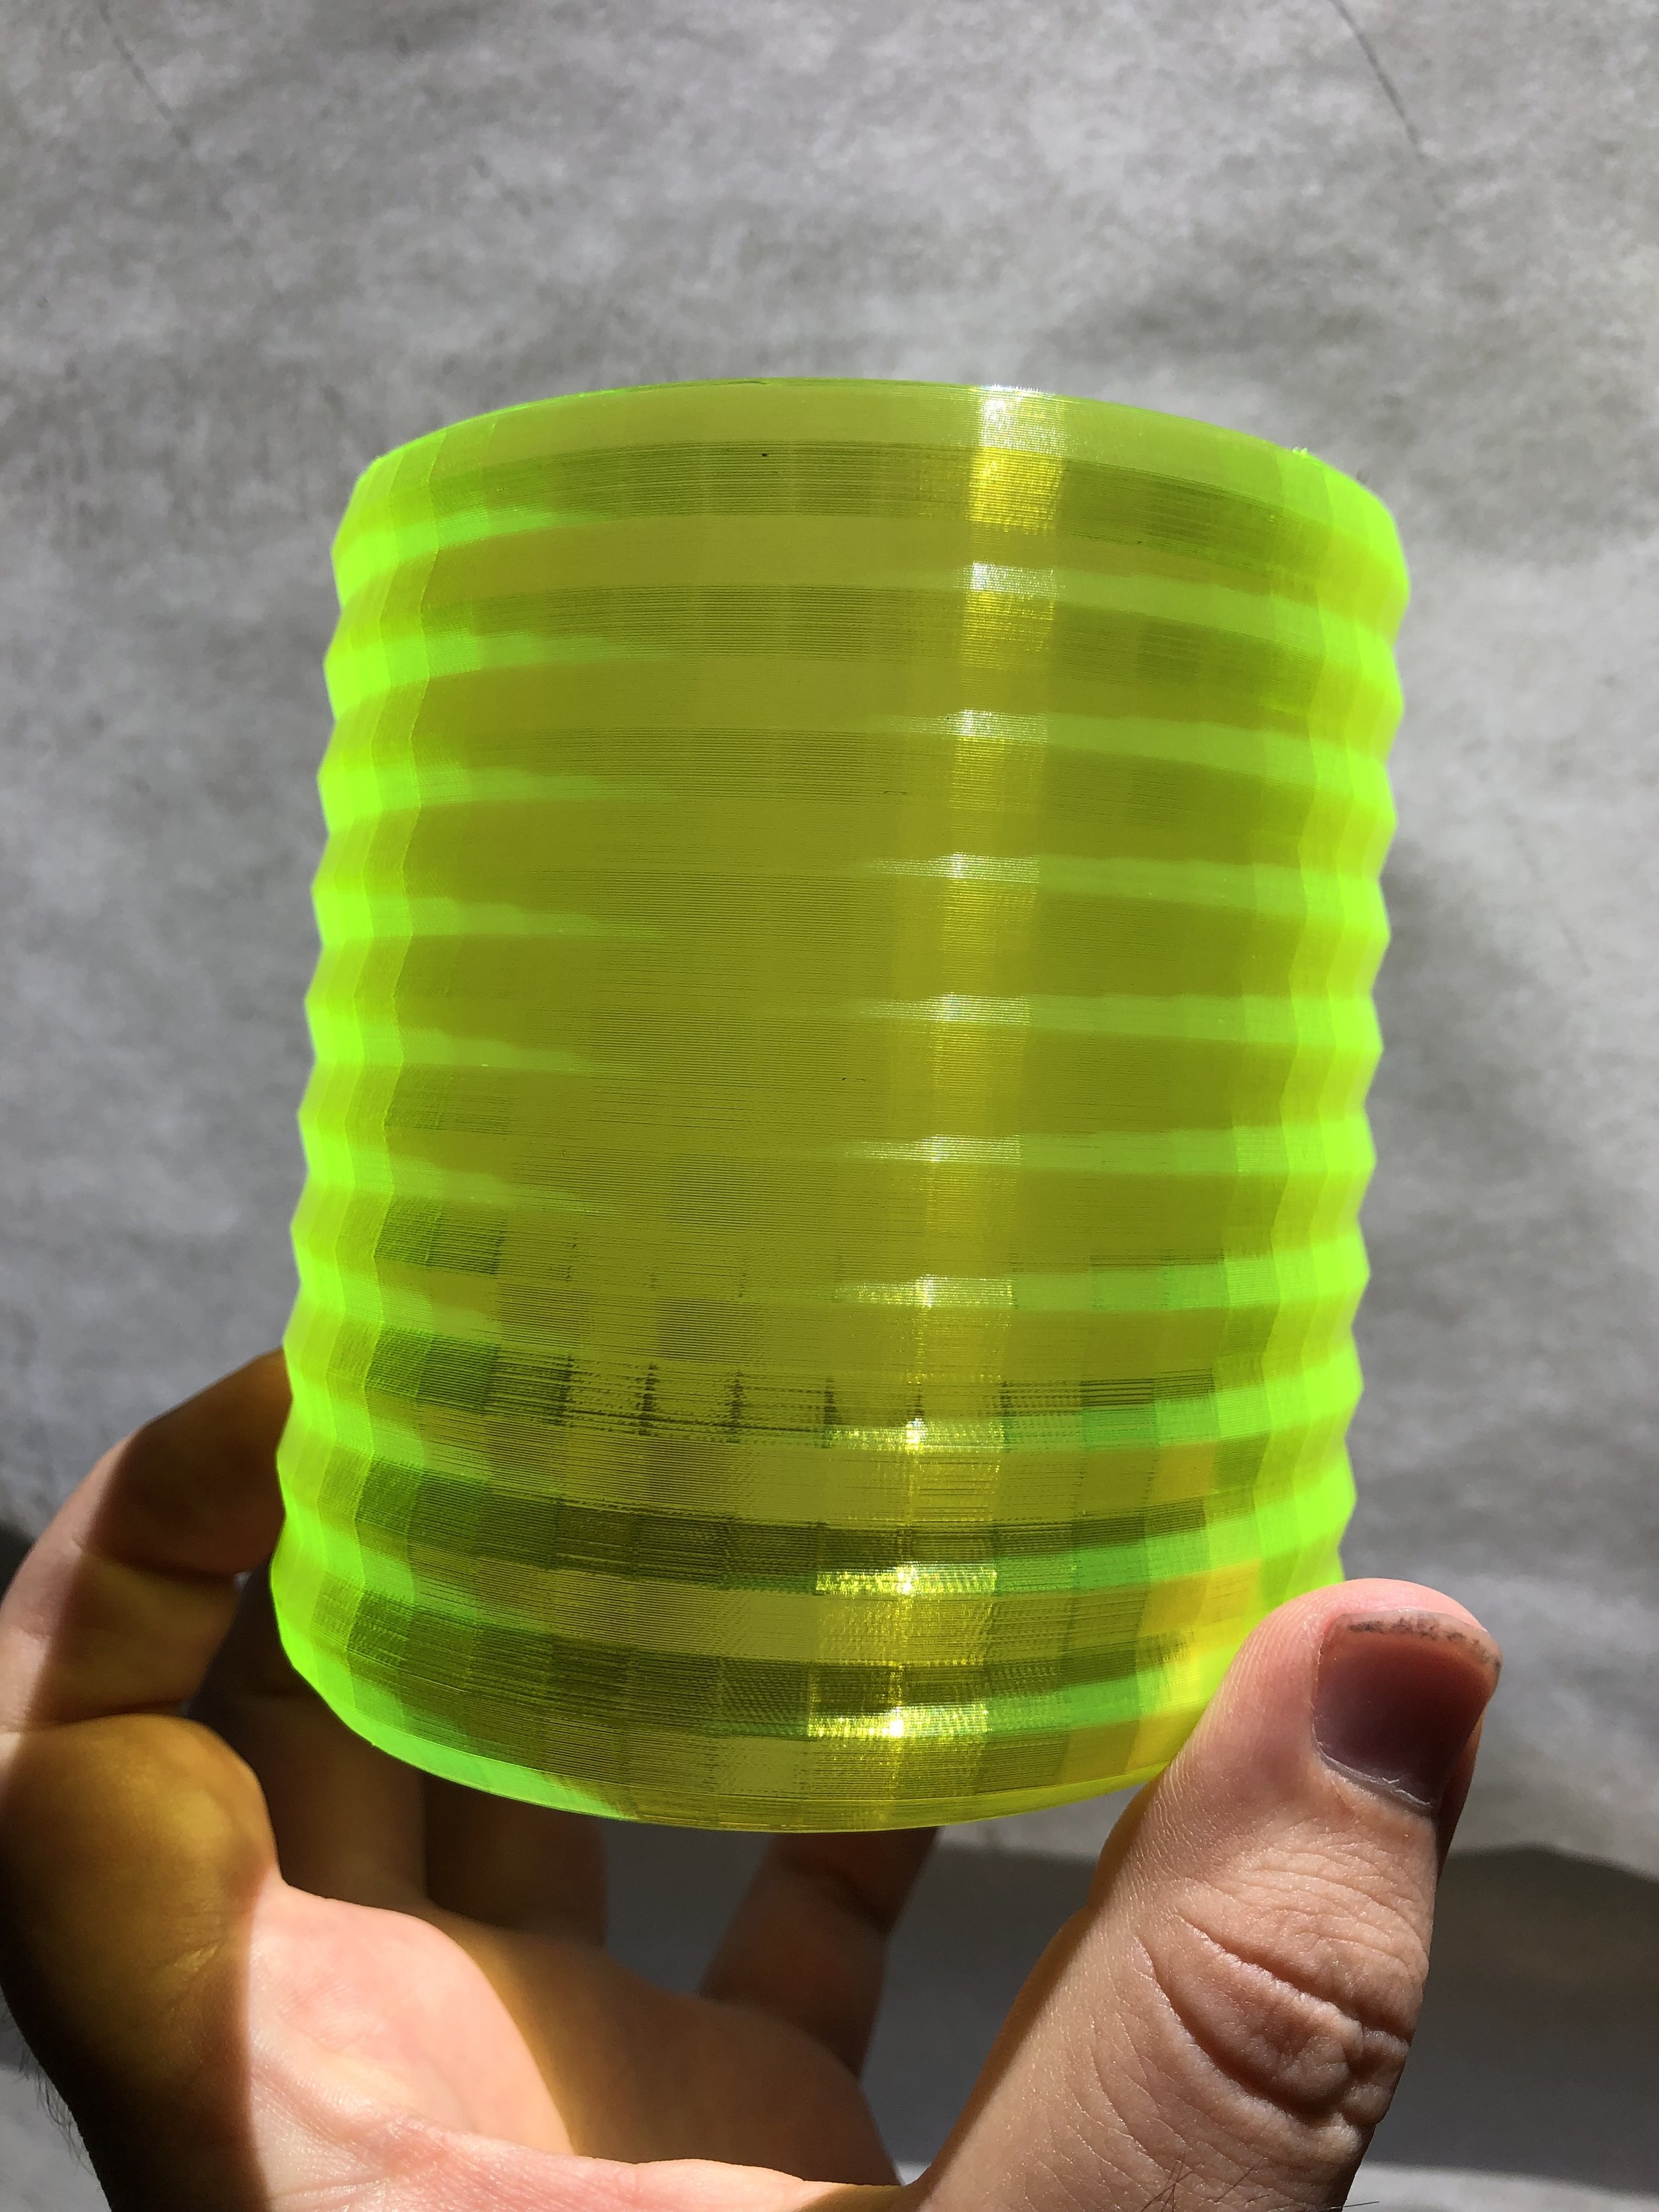


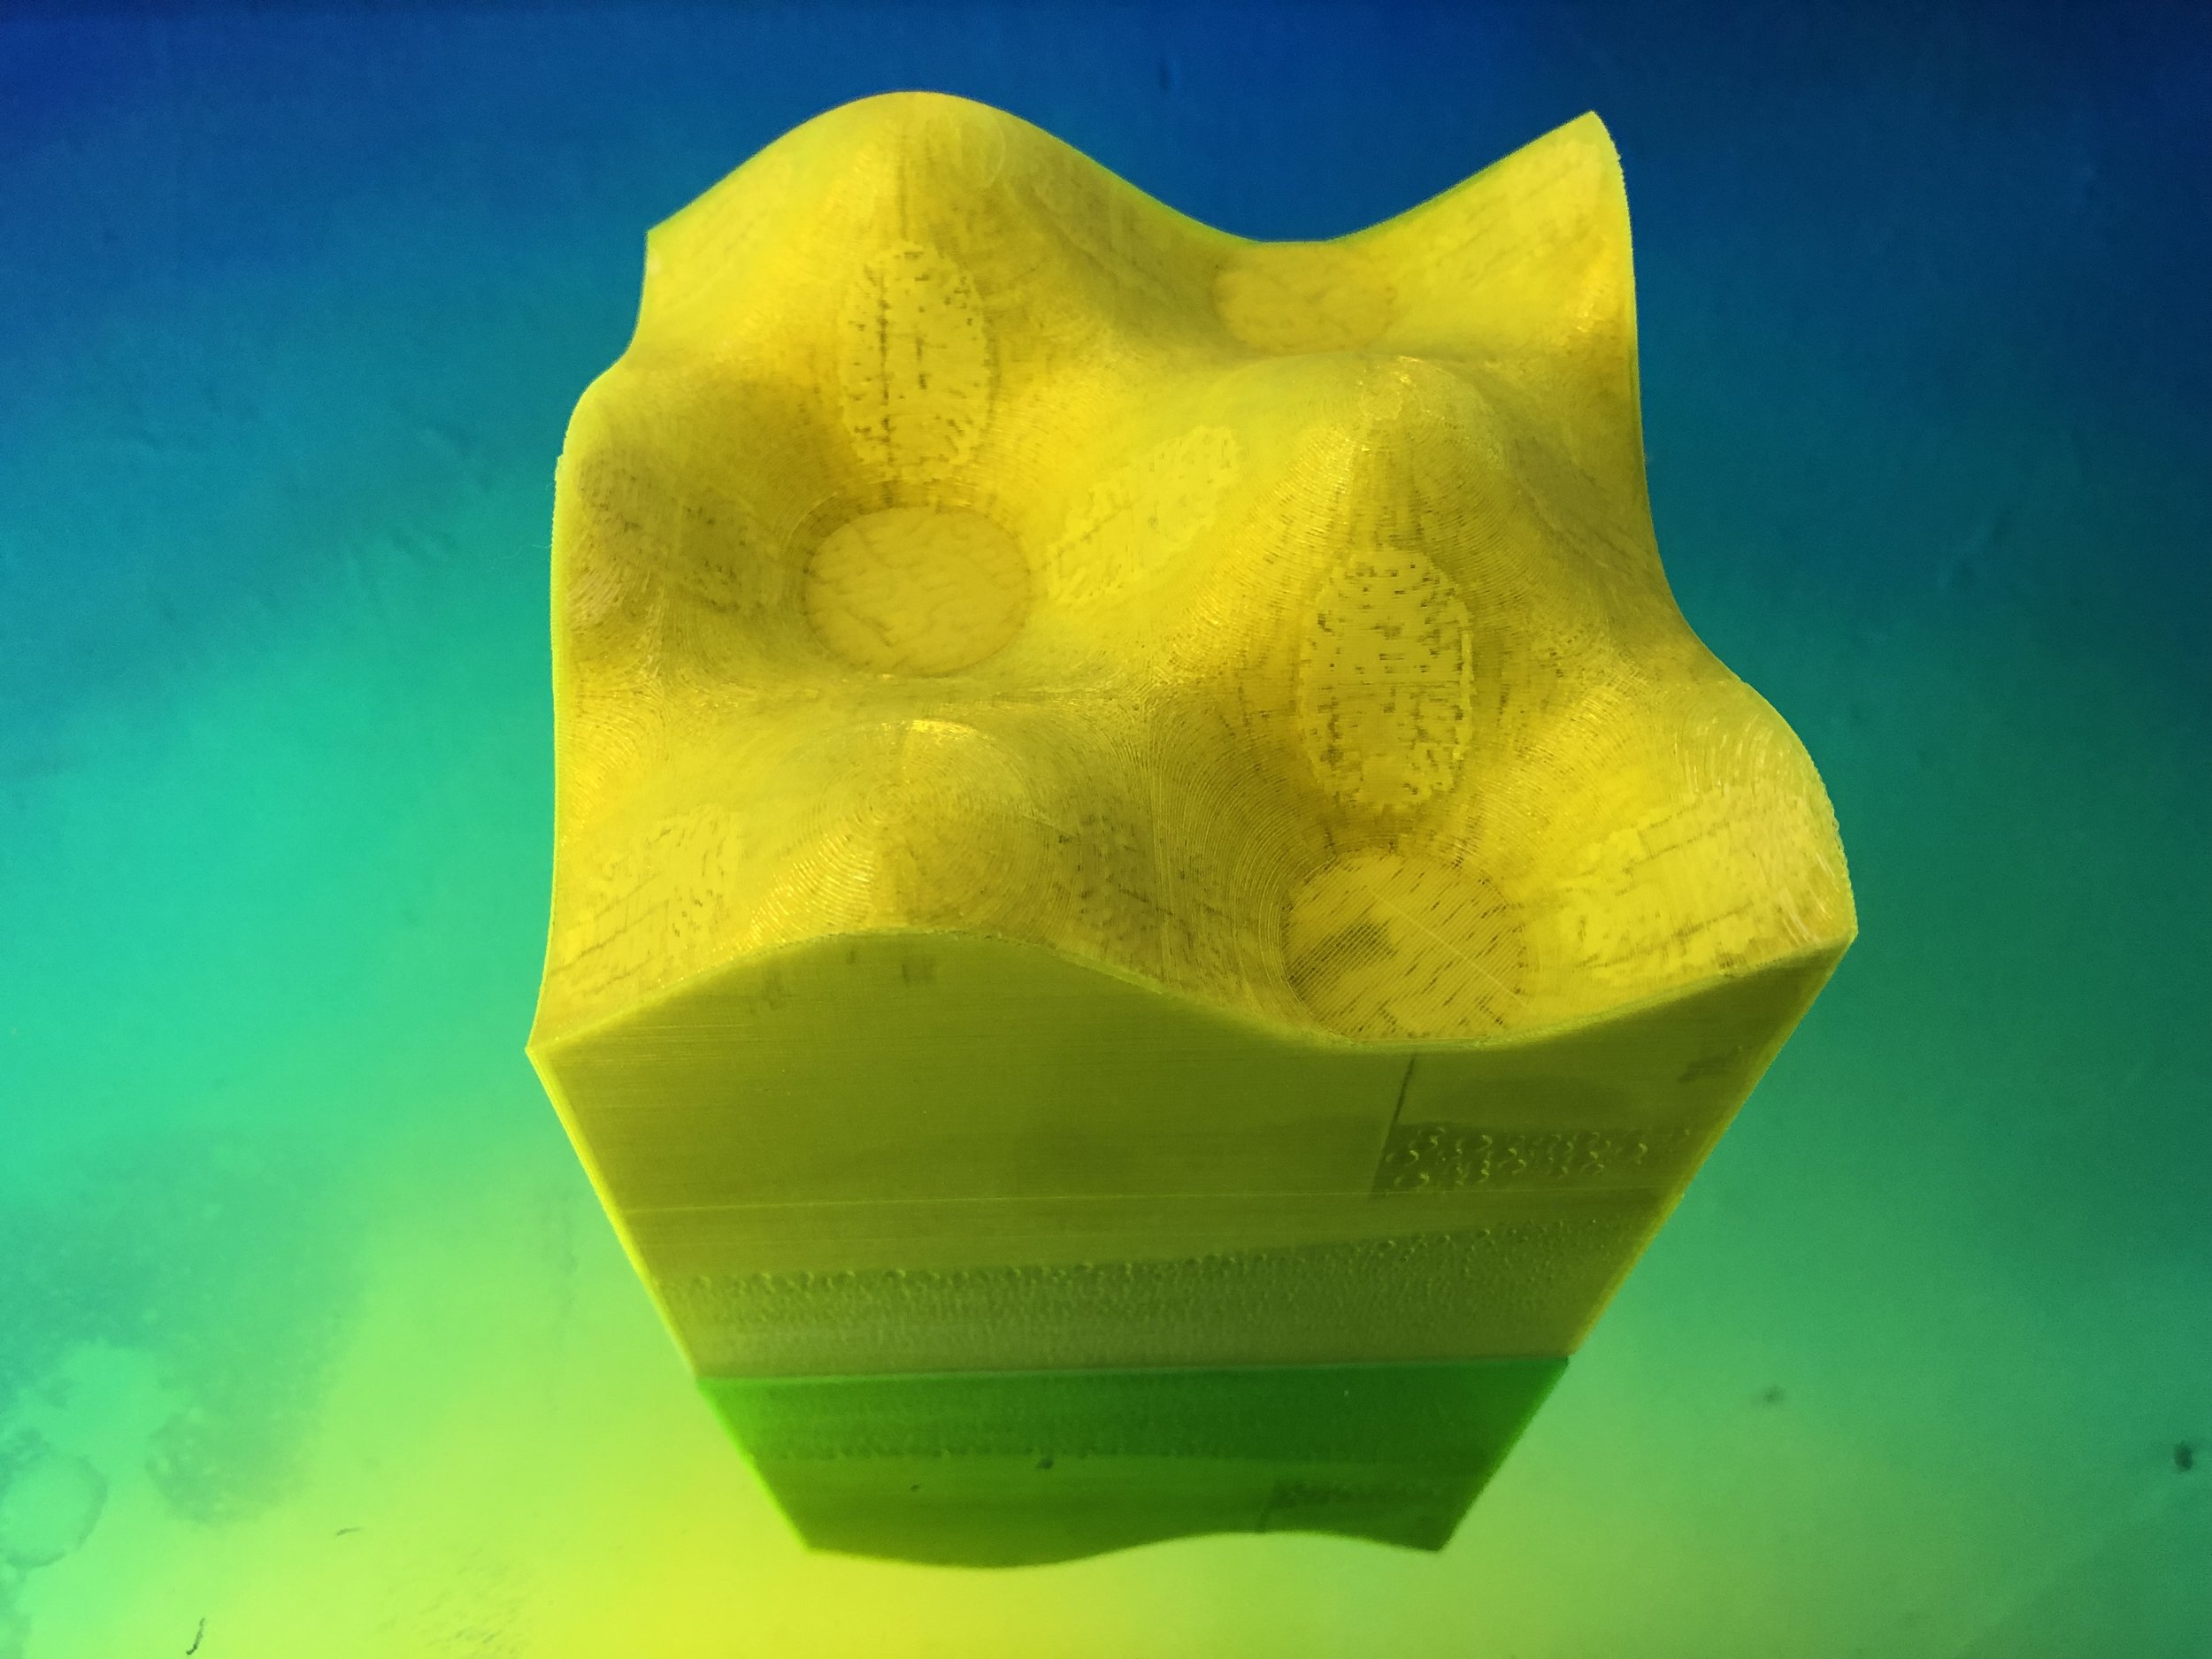


The bases explore a number of 3D printed geometric forms that are filled with plaster for added weight and rigidity to support the 3D printed models. In the plaster base, I poured plaster into a surface textured cylinder printed in vase mode, and fully removed the PLA shell after the plaster set. In the half plaster / half PLA torus cylinder base, I poured plaster using the same method, but only peeled away half of the PLA shell. I liked the way the fluorescent PLA looked, so I wanted to leave some evidence of the process. With the parabolic cube base, I performed a boolean difference operation between a parabolic mesh I had generated in Rhino/Grasshopper with a cube in Blender to get the parabolic top. I poured plaster into this inverted form to make a more rigid anchor point.
Failures + Frustrations:


I ran into quite a few hurdles in my attempts to print dissolvable PVA shells and pouring resin into 3D printed forms. I scheduled two different sessions with a lab tech in the 3D lab to attempt to print the dissolvable PVA. My first session was cancelled because of a Covid exposure. I attempted to set the print up by myself, but there were extrusion problems, which I later learned was a result of the PLA snapping from the spool behind the Ultimaker. Apparently, this is common in the 3D lab because of it’s proximity to the ocean. I scheduled another session with another lab monitor, and we went through a bunch of issues setting up the file. We eventually got the supports printing, and I left for the night. I came back the next morning to this mess. I think this idea of printing a dissolvable PVA shell to expose PLA infill is still worth pursuing, and I will attempt again after this class.
I also had many issues with encapsulating lightning infill in clear resin. My first small test cubes were very promising, so I thought my larger tests would be successful. I used a different resin on the small cubes, which cured well, but didn’t have the clarity I was envisioning. I got deep pour crystal clear casting resin for the larger prints, but ran into a ton of issues. First of all, I had to pour the resin outside of my studio for adequate ventilation. As soon as my resin was poured, flys began landing on the resin, getting stuck, and sinking into my molds. By the end, my forms were completely covered in flies and ants. I was able to cover a few, but covering them also effected their cure time. I sprayed a mold release, but my larger tests didn’t separate from the PLA with the same ease that my smaller tests did. Overall, this was a very frustrating and expensive series of mistakes, but I do think it is worth trying again in the future. I need to find a better well ventilated, but clean workspace.